Strawberry Crunch Cheesecake Slice Recipe
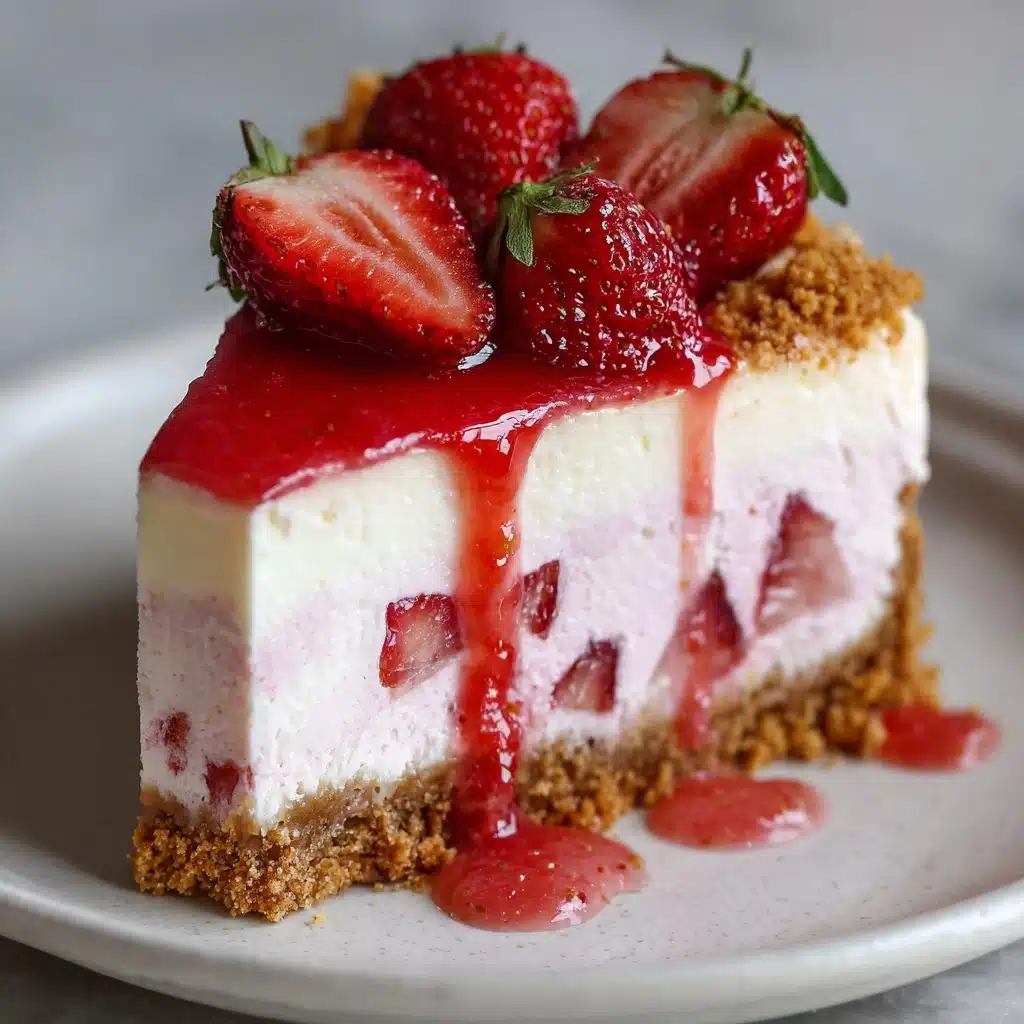
If you haven’t experienced the pure joy of a Strawberry Crunch Cheesecake Slice, get ready for a whole new world of dessert happiness! Imagine a silky, creamy cheesecake swirling with real strawberry preserves, layered on a buttery Golden Oreo crust, and finished with a sweet, nostalgic strawberry crunch topping. It’s everything you love about strawberry shortcake ice cream bars and rich cheesecake in one stunning, sliceable treat. Whether you’re hosting a party or want to add a little sparkle to an ordinary day, this recipe will quickly become your favorite way to celebrate strawberry season—or any season.

Ingredients You’ll Need
The magic of this Strawberry Crunch Cheesecake Slice lies in how a handful of everyday ingredients come together for pure decadence. Each one adds a burst of flavor, creamy texture, or a pop of color that makes every bite memorable.
- Golden Oreos (1½ cups, crushed): These cookies form the indulgent, sweet base that supports all the creamy goodness above.
- Unsalted butter (¼ cup + 2 tbsp, melted): Essential for binding the crust and topping, butter gives an unbeatable rich flavor throughout.
- Cream cheese (16 oz, softened): The foundation of any luxurious cheesecake—make sure it’s room temp for a super silky batter.
- Granulated sugar (¾ cup): Just the right amount to sweeten the filling without overwhelming those fresh strawberry notes.
- Eggs (2): These add structure and a velvety feel to every slice; let them sit out for 10 minutes before mixing if you can.
- Vanilla extract (1 tsp): This simple addition brings warmth and enhances the strawberry flavor.
- Sour cream (½ cup): Sour cream gives each bite that subtle tang and a luscious, creamy texture.
- Strawberry preserves or puree (½ cup): Swirl this into your cheesecake for beautiful marbling and a burst of bright fruitiness.
- Golden Oreos for topping (10): Crush these up for that classic crunch—and save a couple for spontaneous snacking.
- Freeze-dried strawberries (10, or 1 packet strawberry gelatin powder): These provide that iconic berry crunch and a vibrant pink hue.
How to Make Strawberry Crunch Cheesecake Slice
Step 1: Make the Crust
Preheat your oven to 325°F (160°C). Blitz or crush the Golden Oreos into fine crumbs—either in a food processor or by giving them a loving whack in a zip-top bag. Mix the crumbs with melted butter until every speck is moist and holds together when you squeeze it. Press the mixture firmly into a parchment-lined 9×9” pan, making sure you reach all the corners. Pop it in the oven and bake for 8 minutes, just until set and fragrant. Let the pan cool while you whip up the filling.
Step 2: Prepare the Cheesecake Filling
In a large bowl, beat the cream cheese with a hand mixer until totally smooth—don’t rush! Add the granulated sugar and keep mixing, scraping down the bowl so everything blends evenly. Next, beat in the eggs one at a time, letting each get fully incorporated. Stir in the vanilla and sour cream for that creamy, tangy finish. Pour half the cheesecake mixture over your cooled crust and smooth it out. Dollop those gorgeous strawberry preserves or puree on top, then swirl gently with a butter knife for a marbled effect. Top with the remaining cheesecake batter and smooth again for a pristine finish.
Step 3: Bake and Chill
Slide the pan back into the oven and bake for 35–40 minutes. You’re looking for the edges to be slightly puffed and the center to just barely wobble when you tap the pan. Cool on the counter until room temperature, then transfer to the fridge for at least 4 hours (overnight is ideal). This patience rewards you with slices that are perfectly set and gloriously creamy.
Step 4: Make the Strawberry Crunch Topping
Once the cheesecake is chilled, pulse the extra Golden Oreos and freeze-dried strawberries (or strawberry gelatin powder) together until crumbly but not powdered. Stir in the melted butter so the crumbs begin to cling together. Generously sprinkle this mixture all over your chilled cheesecake slab. Press very gently so the topping adheres but doesn’t crush your lovely marbling beneath.
Step 5: Slice and Serve
With everything ready, lift the cheesecake out of the pan using the parchment edges. Slice into thick bars or squares for that satisfying Strawberry Crunch Cheesecake Slice experience. The knife will glide through the crunchy topping and creamy filling, revealing gorgeous swirls and layers. Don’t forget to wipe your knife between slices for neat, bakery-style results!
How to Serve Strawberry Crunch Cheesecake Slice
Garnishes
Amp up the wow factor by topping each Strawberry Crunch Cheesecake Slice with fresh sliced strawberries, a dollop of whipped cream, or even a drizzle of strawberry syrup. If you’re feeling fancy, toss on some white chocolate shavings or an extra pinch of freeze-dried strawberry crumble for a pop of color and fun.
Side Dishes
A little goes a long way with this rich treat! Pair your Strawberry Crunch Cheesecake Slice with a scoop of vanilla ice cream, a handful of fresh berries, or even a cool glass of berry lemonade for ultimate refreshment. The balance of creamy, crunchy, and fresh is absolute dessert bliss.
Creative Ways to Present
Why not impress your guests by serving each slice in cupcake liners for an easy handheld dessert? Or cut the bars into bite-sized cubes for an unforgettable dessert platter at your next party. For a real celebration, top each bar with a tiny birthday candle or edible flower for a playful, personalized touch.
Make Ahead and Storage
Storing Leftovers
Wrap any leftover Strawberry Crunch Cheesecake Slice tightly in plastic wrap or store in an airtight container in the refrigerator. It’ll keep beautifully for 3–4 days, and the crunch topping stays delightfully crisp thanks to the butter and freeze-dried berries.
Freezing
You can absolutely freeze your Strawberry Crunch Cheesecake Slice! Cut into individual pieces, wrap them in plastic and then foil, and pop into a freezer-safe bag or container. They’ll keep their texture for up to a month—just thaw in the fridge overnight before enjoying.
Reheating
There’s no need to reheat these bars (they’re best served chilled), but if you prefer a softer bite, let them sit at room temperature for 10–15 minutes before eating. Just don’t microwave—they’ll lose that delicious crunch on top.
FAQs
Can I use regular Oreos instead of Golden Oreos?
While you can substitute regular Oreos in a pinch, the classic Strawberry Crunch Cheesecake Slice flavor really relies on the vanilla notes from Golden Oreos. If you swap, expect a chocolatey base and a little less of that classic ice cream bar nostalgia!
Can I make this recipe gluten-free?
Absolutely! Just swap in your favorite gluten-free vanilla sandwich cookies for the crust and topping. Everything else in the recipe is naturally gluten-free, so you won’t miss a single crumb.
What if I can’t find freeze-dried strawberries?
No worries—just use strawberry gelatin powder instead. It gives your topping the same bright pink color and flavor punch, though the texture will be a bit finer. You’ll still get that signature Strawberry Crunch!
Can I make these ahead for a party?
These bars are a host’s dream! Make the entire Strawberry Crunch Cheesecake Slice recipe a day in advance, and top with the crunch layer just before serving for maximum freshness and wow-factor.
Is there a way to make the crust extra crisp?
Certainly! For a firmer base, let the baked crust cool completely before pouring on the cheesecake filling, and don’t skip that quick 8-minute bake. It sets the stage for each indulgent slice to hold up perfectly.
Final Thoughts
If you love desserts that deliver big on both flavor and nostalgia, you absolutely have to try this Strawberry Crunch Cheesecake Slice. It’s a conversation starter, a family favorite, and a crave-worthy treat all at once. Light up your kitchen (and everyone’s faces) with a batch soon—you’ll be glad you did!
PrintStrawberry Crunch Cheesecake Slice Recipe
Indulge in the delightful combination of creamy cheesecake and fresh strawberries with a crunchy twist in this Strawberry Crunch Cheesecake Slice recipe. Perfect for any occasion!
- Prep Time: 20 minutes
- Cook Time: 40 minutes
- Total Time: 5 hours
- Yield: 9x9” pan 1x
- Category: Dessert
- Method: Bake
- Cuisine: American
- Diet: Vegetarian
Ingredients
For the Crust:
- 1½ cups Golden Oreos (crushed)
- ¼ cup unsalted butter, melted
For the Cheesecake Filling:
- 16 oz cream cheese, softened
- ¾ cup granulated sugar
- 2 eggs
- 1 tsp vanilla extract
- ½ cup sour cream
- ½ cup strawberry preserves or puree
For the Strawberry Crunch Topping:
- 10 Golden Oreos
- 10 freeze-dried strawberries (or 1 packet strawberry gelatin powder)
- 2 tbsp unsalted butter, melted
Instructions
- Make the Crust: Preheat oven to 325°F (160°C). Mix crushed Golden Oreos and melted butter. Press into a lined 9×9” pan. Bake for 8 minutes, then set aside to cool.
- Prepare the Cheesecake: Beat cream cheese until smooth. Add sugar, then eggs one at a time. Mix in vanilla and sour cream. Pour half the mixture onto the crust. Dollop strawberry preserves and swirl lightly. Add remaining cheesecake batter and smooth the top. Bake for 35–40 minutes until set. Cool completely, then chill in the fridge for at least 4 hours.
- Make the Crunch Topping: Pulse Golden Oreos and freeze-dried strawberries in a food processor. Stir in melted butter until crumbly. Sprinkle generously over the chilled cheesecake and press lightly to adhere.
Nutrition
- Serving Size: 1 slice
- Calories: 380
- Sugar: 24g
- Sodium: 280mg
- Fat: 24g
- Saturated Fat: 13g
- Unsaturated Fat: 9g
- Trans Fat: 0g
- Carbohydrates: 35g
- Fiber: 1g
- Protein: 5g
- Cholesterol: 90mg
Keywords: Strawberry Crunch Cheesecake Slice, Cheesecake Recipe, Strawberry Dessert, Crunchy Cheesecake, Strawberry Preserves, Golden Oreos