No-Bake Lotus Biscoff Cheesecake** Recipe
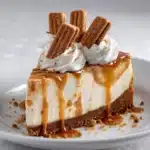
This No-Bake Lotus Biscoff Cheesecake is pure dessert bliss in every forkful! Imagine a velvety, creamy filling that’s light as a cloud—with irresistible swirls of spiced cookie butter—all sitting atop a buttery, crunchy Biscoff cookie crust. As if that isn’t dreamy enough, each chilled slice gets a glossy pour of Lotus Biscoff glaze, a flourish of homemade whipped cream, and a final, crunchy tumble of whole and crushed cookies. It’s the ultimate treat for Biscoff lovers and anyone who adores a decadent cheesecake without having to turn on the oven. Whether it’s a birthday, a potluck, or just because, this no-fuss showstopper guarantees rave reviews.

Ingredients You’ll Need
With just a handful of beloved pantry and fridge staples, you’re on your way to wow-inducing dessert. The magic is in how each ingredient brings its special something—be it tang, creaminess, or that signature spiced Lotus Biscoff flavor—to make this cheesecake irresistible. Here’s what you’ll be gathering:
- Lotus Biscoff cookies: These deeply spiced, caramelized cookies create the most flavorful and crunchy base for your crust.
- Unsalted butter: Melted butter binds the crust together and adds a rich, indulgent flavor.
- Cream cheese: The backbone of your cheesecake filling—it should be soft and at room temperature for the smoothest texture.
- Lotus Biscoff cookie butter spread: This creamy delight infuses every bite with that signature Biscoff warmth; it stars in both the filling and the topping.
- Powdered sugar: Perfect for sweetening the filling and the whipped cream garnish, as it dissolves beautifully without any graininess.
- Vanilla extract: A splash of vanilla elevates the flavor and rounds out the richness of the filling.
- Heavy whipping cream: Adds lightness and structure to the cheesecake when whipped and folded into the filling, and whips up into billowy clouds for your garnish.
- Milk or extra cream: Used only if needed to thin the Biscoff topping to a glossy, pourable consistency.
- Whole and crushed Biscoff cookies: For the irresistible final garnish—think crunch, texture, and visual wow-factor.
How to Make No-Bake Lotus Biscoff Cheesecake
Step 1: Make the Biscoff Cookie Crust
Start by crushing the Biscoff cookies until they’re fine and sandy—use a food processor for ease, or place them in a zip-top bag and roll with a pin for a bit of cookie therapy. Mix these lovely crumbs with the melted unsalted butter, combining until every morsel is coated and moistened. Press the mixture firmly into the base of your 9-inch springform pan, going slightly up the sides if you want dramatic effect and extra crunch. Chill this in the fridge so it sets up and provides a sturdy foundation for your cheesecake.
Step 2: Prepare the No-Bake Lotus Biscoff Cheesecake Filling
In a large bowl, beat the cream cheese with an electric mixer until it’s smooth and dreamy—no lumps, please! Next, add in the softened cookie butter, the sifted powdered sugar, and that touch of vanilla. Beat again until everything is combined—your kitchen will already be smelling amazing. In a separate cold bowl, whip your heavy cream to stiff peaks (it should be thick and hold its shape). Carefully fold the whipped cream into your Biscoff cream cheese mixture in two additions, moving gently to keep the filling light and airy. This is where the cheesecake gets its signature, mousse-like texture.
Step 3: Assemble the Cheesecake
Pour the luscious Biscoff cheesecake mixture onto the chilled cookie crust, smoothing the top with an offset spatula or the back of a spoon. Cover the pan loosely with plastic wrap and refrigerate for at least 6 hours (but overnight is perfection!) to allow the filling to set firm and sliceable.
Step 4: Make the Biscoff Cookie Butter Topping/Glaze
Take your Biscoff cookie butter for the topping and gently melt it—either in the microwave in short bursts, stirring well, or on the stovetop over low heat. If it seems too thick for drizzling, add milk or a splash of cream a teaspoon at a time until you have a glossy, pourable glaze. Let it cool a bit; you want it pourable but not hot.
Step 5: Whip Up the Garnish
In a cold mixing bowl, combine the heavy cream, powdered sugar, and vanilla. Whip until medium-stiff peaks form. This whipped cream is destined to add cloudlike billows on top of your No-Bake Lotus Biscoff Cheesecake—if you love decorating, get out your piping bag, or simply dollop with a spoon.
Step 6: Decorate and Slice
Once your cheesecake is set, run a thin, warm knife around the edge and release it from the springform pan. Transfer to a cake stand or platter. Pour that luscious Biscoff glaze over the top so it drips enticingly down the sides. Pipe or dollop on the whipped cream, sprinkle generously with crushed Biscoff cookies, then finish with whole cookies artfully arranged. For picture-perfect slices, dip your knife in hot water and wipe clean between cuts—and serve chilled for maximum enjoyment!
How to Serve No-Bake Lotus Biscoff Cheesecake

Garnishes
Say yes to extra flair! Garnish your No-Bake Lotus Biscoff Cheesecake with generous swoops or piped rosettes of whipped cream, a scatter of crushed Biscoff cookies for crunch, and whole Biscoff cookies for visual drama and bite. The drizzle of glossy cookie butter glaze really takes this cheesecake from special to spectacular.
Side Dishes
Since this cheesecake is rich and decadent, it pairs beautifully with lighter sides. Serve up cups of hot coffee or espresso to balance the sweetness, or add fresh, tart berries on the plate. A dollop of unsweetened Greek yogurt is also surprisingly lovely with each bite, providing a cool, tangy complement.
Creative Ways to Present
Mini cheesecakes in individual jars are perfect for parties and picnics—just layer up the crust, filling, and toppings. For a fun twist, slice into small cubes or bars for a dessert platter, or serve family-style straight from the pan for casual gatherings. No-Bake Lotus Biscoff Cheesecake also makes a glorious centerpiece for a dessert table, especially with a dramatic fan of cookies on top.
Make Ahead and Storage
Storing Leftovers
Cover the cheesecake tightly in its pan or on a plate with plastic wrap and refrigerate for up to 5 days. If you’ve already sliced it, cover each slice individually for optimum freshness. The flavor and texture just get better and more harmonious as it chills!
Freezing
Yes, you can freeze this No-Bake Lotus Biscoff Cheesecake! For best results, freeze slices or the whole cake (before garnishing) wrapped tightly in plastic wrap and foil. It’ll keep well for up to 2 months. Thaw overnight in the fridge before decorating and serving—so easy for preparing ahead.
Reheating
No reheating is needed, as this cheesecake is meant to be enjoyed cold! If frozen, simply let it thaw gently in the fridge; avoid the microwave or any heat, since it can compromise the creamy texture you worked so hard for.
FAQs
Can I use a different brand of cookie butter?
Absolutely! If you can’t find Lotus Biscoff, another brand of cookie butter will work, though the flavor may be a touch different. The key is to use a smooth, spreadable cookie butter for both the filling and glaze so everything stays creamy.
Do I really need a springform pan for this recipe?
A springform pan makes removing and slicing your No-Bake Lotus Biscoff Cheesecake a breeze, but if you don’t have one, a deep pie dish or an 8×8-inch square pan will work. Just line it with parchment overhangs for easier lifting.
Why is my cheesecake filling runny or too soft?
The main culprits are under-whipped cream or not chilling the cheesecake long enough. Whip your cream to stiff peaks, fold gently, and always chill the cake for at least 6 hours—overnight if possible—for a perfectly sliceable result.
Can I make this recipe gluten-free?
Definitely! Swap in gluten-free speculoos or gingersnap-style cookies and use a certified gluten-free cookie butter. Everything else in this recipe is naturally gluten-free, so you can safely indulge.
Can I add chocolate to this cheesecake?
Yes, chocolate lovers can swirl in melted chocolate to the filling, or drizzle chocolate ganache over the top. Even a handful of mini chocolate chips folded into the batter adds a fun, surprising twist to the classic No-Bake Lotus Biscoff Cheesecake.
Final Thoughts
If you’re looking for a showstopping, fuss-free dessert, this No-Bake Lotus Biscoff Cheesecake never disappoints. Each step is truly rewarding, leading to a creamy, spiced, and utterly moreish masterpiece. Give it a try, share it with friends, and let the rave reviews roll in!
PrintNo-Bake Lotus Biscoff Cheesecake** Recipe
Indulge in the irresistible delight of this No-Bake Lotus Biscoff Cheesecake. A decadent fusion of creamy cheesecake filling atop a Biscoff cookie crust, adorned with a luscious cookie butter glaze and fluffy whipped cream garnish.
- Prep Time: 30 minutes
- Total Time: 6 hours 30 minutes
- Yield: 1 9-inch cheesecake 1x
- Category: Dessert
- Method: No-Bake
- Cuisine: American
- Diet: Vegetarian
Ingredients
For the Biscoff Cookie Crust:
- 25–30 Lotus Biscoff cookies (about 9 oz or 250g), finely crushed
- ½ cup (113g) unsalted butter, melted
For the No-Bake Biscoff Cheesecake Filling:
- 16 oz (2 blocks, 450g) cream cheese, softened to room temperature
- ¾ cup (180g) creamy Lotus Biscoff cookie butter spread, softened slightly
- ¾ cup (150g) powdered sugar (icing sugar), sifted
- 1 teaspoon vanilla extract
- 1 ½ cups (360ml) heavy cream (whipping cream), cold
For the Biscoff Cookie Butter Topping/Glaze:
- ¾ cup (180g) creamy Lotus Biscoff cookie butter spread
- 2 tablespoons milk or heavy cream (if needed for thinner consistency)
For Garnish:
- 1 cup (240ml) cold heavy cream
- 2 tablespoons powdered sugar
- ½ teaspoon vanilla extract
- 4–6 whole Lotus Biscoff cookies
- 2–3 tablespoons crushed Lotus Biscoff cookies (from crust ingredients, or extra)
Instructions
- Prepare the Biscoff Cookie Crust: In a medium bowl, combine the finely crushed Biscoff cookies and melted butter. Mix until well combined and the crumbs are moistened. Press the mixture firmly and evenly into the bottom of a 9-inch springform pan. Refrigerate the crust while you prepare the filling.
- Make the No-Bake Biscoff Cheesecake Filling: Beat the softened cream cheese until smooth. Add Biscoff spread, powdered sugar, and vanilla. Whip cold heavy cream separately and fold into the cream cheese mixture.
- Assemble the Cheesecake: Pour the filling over the chilled crust in the pan. Smooth the top, cover with plastic wrap, and refrigerate for at least 6 hours or overnight.
- Prepare the Biscoff Cookie Butter Topping/Glaze: Warm the Biscoff spread until pourable. Adjust consistency with milk or cream. Let it cool slightly.
- Prepare Whipped Cream Garnish: Whip cold cream with powdered sugar and vanilla until medium-stiff peaks form.
- Decorate and Serve: Remove the cheesecake from the pan, transfer to a plate. Pour the Biscoff glaze over the top, pipe whipped cream dollops, sprinkle with crushed cookies, and arrange whole cookies on top. Slice and serve chilled.
Nutrition
- Serving Size: 1 slice
- Calories: 450
- Sugar: 22g
- Sodium: 280mg
- Fat: 34g
- Saturated Fat: 20g
- Unsaturated Fat: 11g
- Trans Fat: 0g
- Carbohydrates: 35g
- Fiber: 1g
- Protein: 6g
- Cholesterol: 100mg
Keywords: No-Bake, Lotus Biscoff, Cheesecake, Dessert, Biscoff Cookie, Cookie Butter