Velvet Berry Bliss Cheesecake Recipe
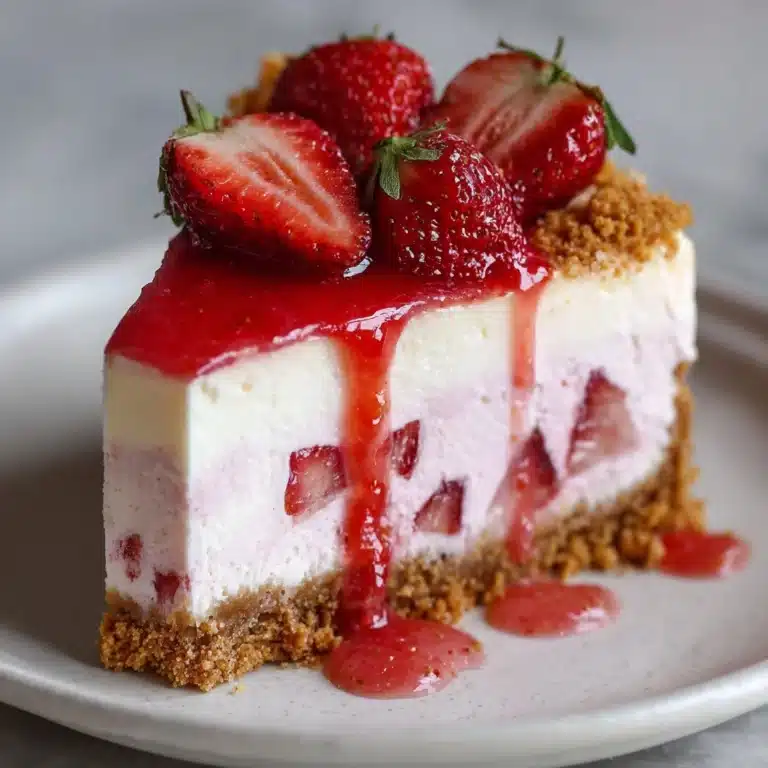
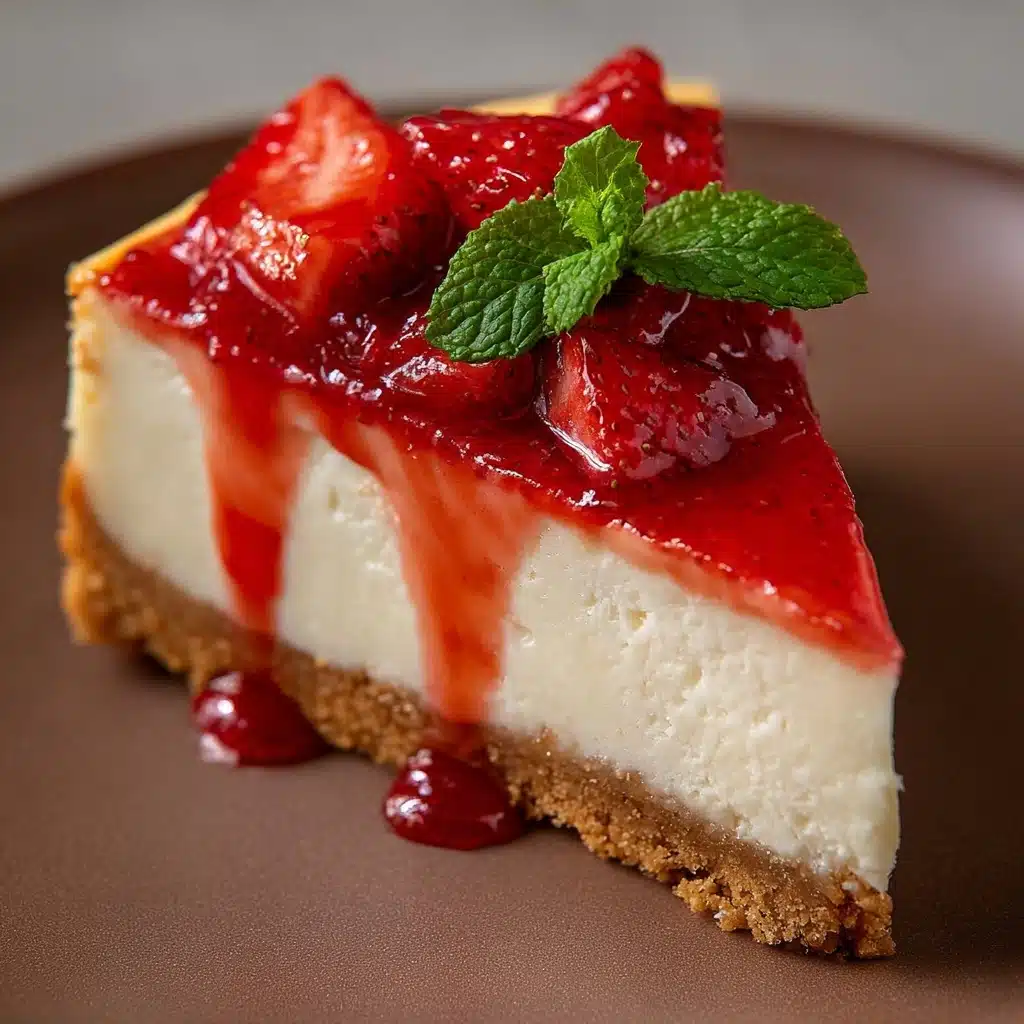
If you are searching for a dessert that feels like a dreamy escape into a luscious garden of flavors, look no further than the Velvet Berry Bliss Cheesecake. This delightful creation combines the silkiness of perfectly whipped cream cheese with the vibrant burst of mixed berries swirled through every bite. Each spoonful delivers a tender texture on a buttery crust, topped with a tangy yet sweet berry compote that dances on your taste buds. It’s the kind of cheesecake that has you reaching for seconds with a smile, making it an absolute must-try for anyone who loves the harmony of creamy and fruity delights.
Ingredients You’ll Need
The secret to the Velvet Berry Bliss Cheesecake’s irresistible charm lies in its straightforward and carefully chosen ingredients. Each component plays a key role, from the buttery crust that provides crunch and comfort to the rich, velvety filling and the vibrant berry layer that adds color and freshness.
- Graham cracker crumbs (1 ½ cups / 150 g): These create a crunchy, sweet base that complements the creamy filling perfectly.
- Unsalted butter (⅓ cup / 75 g), melted: Binds the crust ingredients together while adding a rich, luscious texture.
- Granulated sugar (2 tablespoons for crust, ¼ cup for berry layer): Enhances sweetness and balances the tartness in the berries and crust.
- Cream cheese (16 ounces / 450 g), softened: The heart of the cheesecake, bringing creaminess and depth.
- Heavy whipping cream (1 cup / 240 ml), cold: Whipped into stiff peaks for that cloud-like texture everyone loves.
- Powdered sugar (¾ cup / 90 g): Sweetens and smooths out the cheesecake filling beautifully.
- Vanilla extract (1 teaspoon): Adds warmth and subtle aromatic notes.
- Lemon juice (1 tablespoon for filling, 1 tablespoon for berry layer): Just a splash brightens up the whole dish with a fresh zing.
- Mixed berries (1 ½ cups / 225 g): The glorious mix of strawberries, blueberries, raspberries, or blackberries creates a colorful, tangy topping.
- Cornstarch (1 teaspoon): Mixed with water to thicken the berry sauce for a jammy consistency.
- Fresh berries, whipped cream swirls, mint leaves or berry coulis (optional): These elevate the presentation and add fresh, vibrant finishing touches.
How to Make Velvet Berry Bliss Cheesecake
Step 1: Prepare the Crust
Start by mixing the graham cracker crumbs, melted butter, and sugar until the texture is like damp sand. This ensures that your crust will hold together perfectly with a crisp yet tender bite.
Step 2: Form the Base
Press the crumb mixture firmly into the bottom of a 9-inch springform pan. Compacting it well is key to supporting the creamy filling that comes next. Pop it into the fridge to chill as you prepare the rest.
Step 3: Make the Berry Layer
In a saucepan over medium heat, combine your chosen berries, sugar, and lemon juice. Cook gently for about 5 to 7 minutes until the berries release their luscious juices. Stir in the cornstarch slurry and simmer briefly until the compote thickens beautifully. Setting this aside to cool ensures the filling won’t melt it later.
Step 4: Prepare the Cheesecake Filling
Beat the softened cream cheese until smooth and silky, then add powdered sugar, vanilla, and lemon juice. Mix until the texture is creamy and dreamy, which sets the stage for that perfect softness.
Step 5: Whip the Cream
Whip the cold heavy cream until stiff peaks form. This step is essential for adding lightness and volume, giving you that cloudlike fluff everyone craves in a velvet cheesecake.
Step 6: Combine Filling and Cream
Gently fold the whipped cream into the cream cheese mixture. Take your time here to keep it airy and smooth—this is the magic that makes your Velvet Berry Bliss Cheesecake so decadently soft.
Step 7: Assemble the Layers
Start with half the cheesecake filling on top of the chilled crust. Layer half of the cooled berry sauce over it, then add the remaining filling. For that stunning marbled look, swirl in the remaining berry compote using a knife or toothpick.
Step 8: Chill and Set
Cover your masterpiece and refrigerate for at least 6 hours—or better yet, overnight—so it can set firm and the flavors have time to mingle and deepen.
How to Serve Velvet Berry Bliss Cheesecake
Garnishes
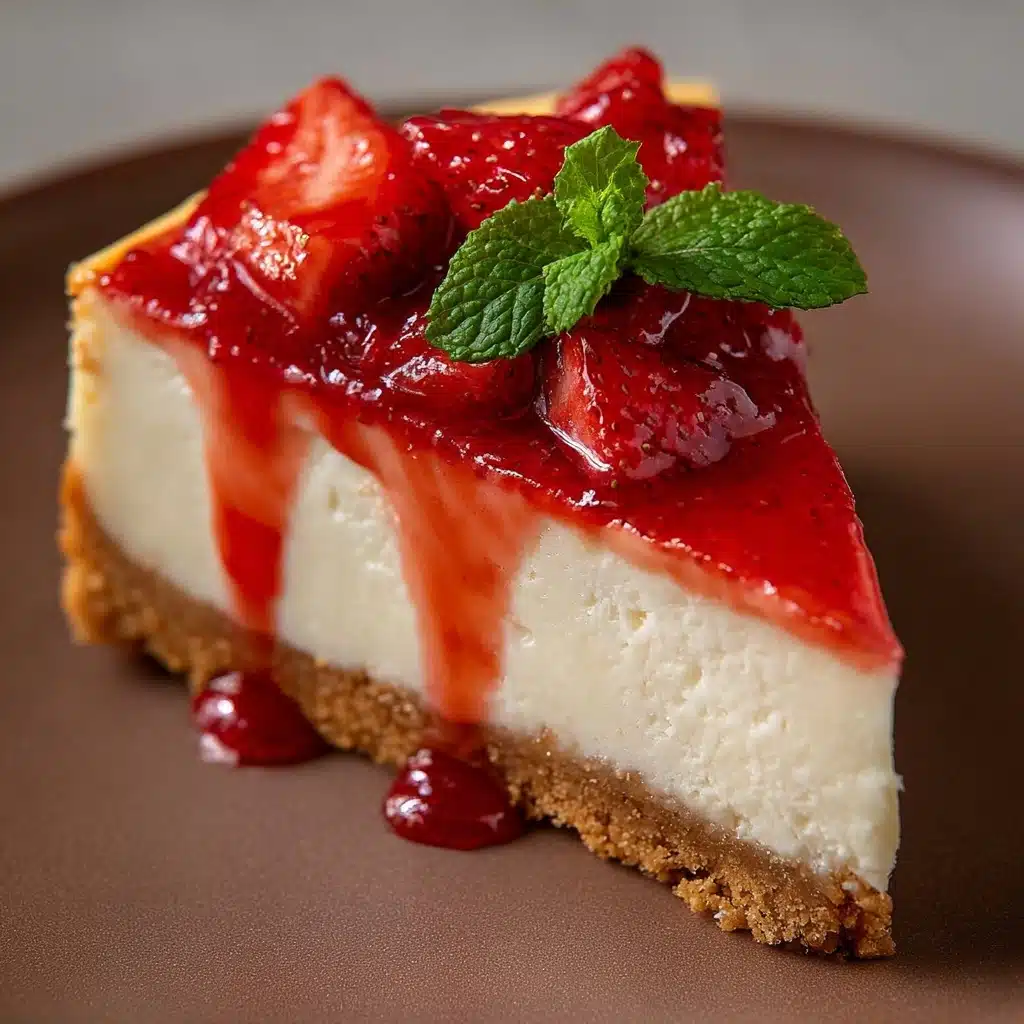
Before serving the Velvet Berry Bliss Cheesecake, adorn it with fresh mixed berries, delicate swirls of whipped cream, and a few mint leaves. These garnishes add freshness, elegance, and that pop of color that makes the dessert as beautiful as it is delicious.
Side Dishes
This cheesecake pairs wonderfully with a cup of freshly brewed coffee, a scoop of vanilla bean ice cream, or a light herbal tea. Each side can either mellow the richness or complement the tart berry notes with gentle, comforting contrasts.
Creative Ways to Present
Try serving individual mini cheesecakes in clear jars or ring molds for an elegant touch at your next gathering. You can also drizzle a vibrant berry coulis over slices plated with fresh mint and berry clusters to impress guests visually and satisfy their sweet cravings.
Make Ahead and Storage
Storing Leftovers
Velvet Berry Bliss Cheesecake keeps beautifully in the refrigerator for up to 4 days. Store it covered tightly with plastic wrap or in an airtight container to maintain its creamy texture and keep the berries fresh.
Freezing
If you want to save some for later indulgence, freeze the cheesecake wrapped securely in plastic wrap followed by aluminum foil. It will keep for up to 2 months; just thaw overnight in the fridge before serving for the best experience.
Reheating
This cheesecake is best enjoyed cold, but if you prefer it slightly softer after refrigeration, let it sit at room temperature for 15–20 minutes. Avoid microwaving as it can disrupt the creamy texture and melt the beautiful berry swirls.
FAQs
Can I use frozen berries for the Velvet Berry Bliss Cheesecake?
Absolutely! Frozen berries work wonderfully and can even create a richer compote once cooked down. Just make sure to thaw and drain any excess water before using to keep the filling from becoming too wet.
Is it possible to make this cheesecake without a springform pan?
You can use a regular cake pan or even a pie dish, but a springform pan makes removing the cheesecake easier without disrupting its delicate layers. If you don’t have one, line your pan with parchment paper for better results.
How do I get the best marbled effect with the berry sauce?
After layering the filling and berry compote, use a knife or toothpick to gently swirl the sauce into the filling. Avoid over-swiping so the colors stay distinct and beautiful.
Can I substitute cream cheese with a lighter option?
You can try using mascarpone or a blend with ricotta for a lighter texture, but keep in mind that cream cheese provides the tang and body that make the Velvet Berry Bliss Cheesecake so indulgent.
What if I don’t have cornstarch for thickening the berry layer?
Arrowroot powder or flour can be used as alternatives in the same quantity. Just be sure to mix with water first and cook the berry sauce until thickened well to prevent a runny topping.
Final Thoughts
If you want a dessert that combines elegance, ease, and extraordinary flavor, the Velvet Berry Bliss Cheesecake is a celebration in every bite. Whether for a special occasion or a treat to brighten your day, it’s bound to become one of those favorites you keep coming back to. So roll up your sleeves, gather those fresh berries, and dive into this blissful, velvety cheesecake experience that feels like a hug wrapped in sweetness.
PrintVelvet Berry Bliss Cheesecake Recipe
Velvet Berry Bliss Cheesecake is a luscious no-bake dessert featuring a crunchy graham cracker crust, a creamy and fluffy cream cheese filling, and a vibrant mixed berry compote that’s swirled throughout for a beautiful marbled effect. Topped with fresh berries, whipped cream, and mint leaves, it’s a perfect elegant treat for summer or any special occasion.
- Prep Time: 30 minutes
- Cook Time: 10 minutes
- Total Time: 6 hours 40 minutes
- Yield: 8 servings 1x
- Category: Dessert
- Method: No-Bake
- Cuisine: American
- Diet: Vegetarian
Ingredients
For the Crust:
- 1 ½ cups (150 g) graham cracker crumbs or digestive biscuit crumbs
- ⅓ cup (75 g) unsalted butter, melted
- 2 tablespoons granulated sugar
For the Cheesecake Filling:
- 16 ounces (450 g) cream cheese, softened
- 1 cup (240 ml) heavy whipping cream, cold
- ¾ cup (90 g) powdered sugar
- 1 teaspoon vanilla extract
- 1 tablespoon lemon juice (optional, for brightness)
For the Berry Layer:
- 1 ½ cups (225 g) mixed berries (strawberries, blueberries, raspberries, or blackberries – fresh or frozen)
- ¼ cup (50 g) granulated sugar
- 1 tablespoon lemon juice
- 1 teaspoon cornstarch mixed with 2 teaspoons water (for thickening)
For Garnish (optional):
- Fresh mixed berries
- Whipped cream swirls
- Mint leaves or berry coulis drizzle
Instructions
- Prepare the Crust: Combine graham cracker crumbs, melted butter, and sugar in a bowl. Mix until the texture resembles wet sand, ensuring all crumbs are evenly coated for a solid crust base.
- Form the Base: Press the crumb mixture evenly into the bottom of a 9-inch (23 cm) springform pan. Compact firmly using the back of a spoon or glass to create an even, dense crust. Refrigerate for at least 30 minutes to set.
- Make the Berry Layer: In a small saucepan over medium heat, combine mixed berries, sugar, and lemon juice. Cook for 5–7 minutes, stirring often, until the berries soften and release their juices. Stir in the cornstarch slurry and simmer for another 1–2 minutes until the mixture thickens. Remove from heat and cool completely to room temperature.
- Prepare the Cheesecake Filling: In a large mixing bowl, beat the softened cream cheese until smooth and creamy. Add powdered sugar, vanilla extract, and lemon juice, then continue beating until fully incorporated and fluffy.
- Whip the Cream: In a separate bowl, whip the cold heavy cream until stiff peaks form, creating a light and airy texture to balance the cheesecake filling.
- Combine: Gently fold the whipped cream into the cream cheese mixture, being careful to maintain the fluffiness and creating a smooth, airy filling.
- Assemble the Cheesecake: Spoon half of the cheesecake filling evenly over the chilled crust. Spread half of the cooled berry sauce over the filling. Add the remaining filling on top and smooth the surface. Use a knife or toothpick to swirl the remaining berry sauce into the top layer for a marbled, artistic effect.
- Chill and Set: Cover the springform pan with plastic wrap and refrigerate for at least 6 hours or overnight to allow the cheesecake to firm up and the flavors to meld beautifully.
- Garnish and Serve: Before serving, decorate with fresh mixed berries, whipped cream swirls, and mint leaves or a drizzle of berry coulis for an eye-catching and flavorful finish. Slice and enjoy this creamy, fruity Velvet Berry Bliss Cheesecake.
Notes
- Using cold heavy cream helps achieve better stiff peaks when whipping.
- The lemon juice in the filling and berry layer adds brightness and balances sweetness but can be omitted if preferred.
- If using frozen berries, thaw and drain excess liquid before cooking to avoid a watery compote.
- This cheesecake is best served chilled and consumed within 2-3 days for optimal freshness.
- For a gluten-free version, ensure graham cracker crumbs or biscuits are certified gluten-free.
Nutrition
- Serving Size: 1 slice (approx. 1/8 of cheesecake)
- Calories: 410 kcal
- Sugar: 28 g
- Sodium: 210 mg
- Fat: 30 g
- Saturated Fat: 18 g
- Unsaturated Fat: 10 g
- Trans Fat: 0 g
- Carbohydrates: 27 g
- Fiber: 2 g
- Protein: 6 g
- Cholesterol: 85 mg
Keywords: berry cheesecake, no bake dessert, summer dessert, mixed berries, creamy cheesecake, velvet berry bliss

