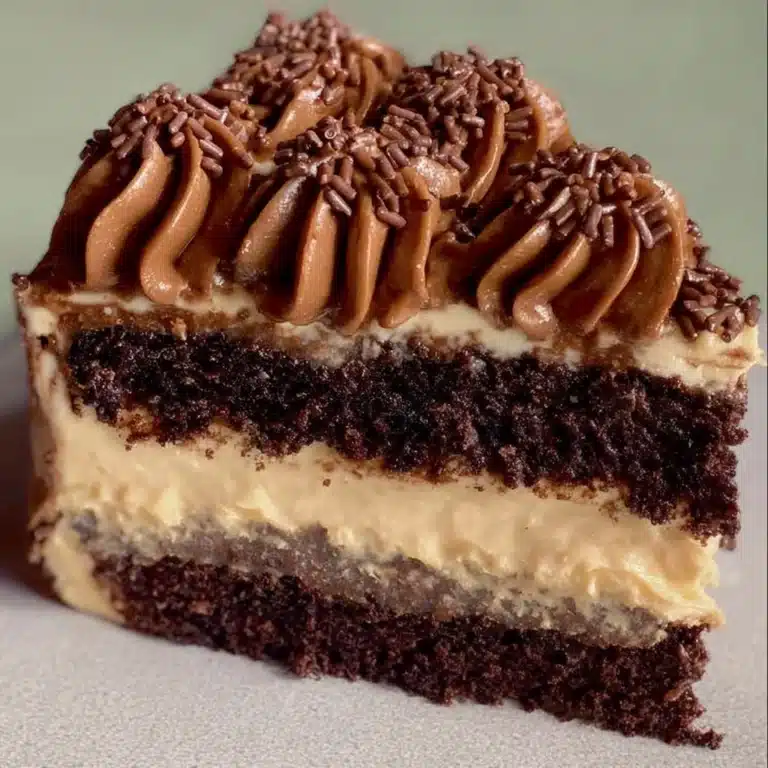
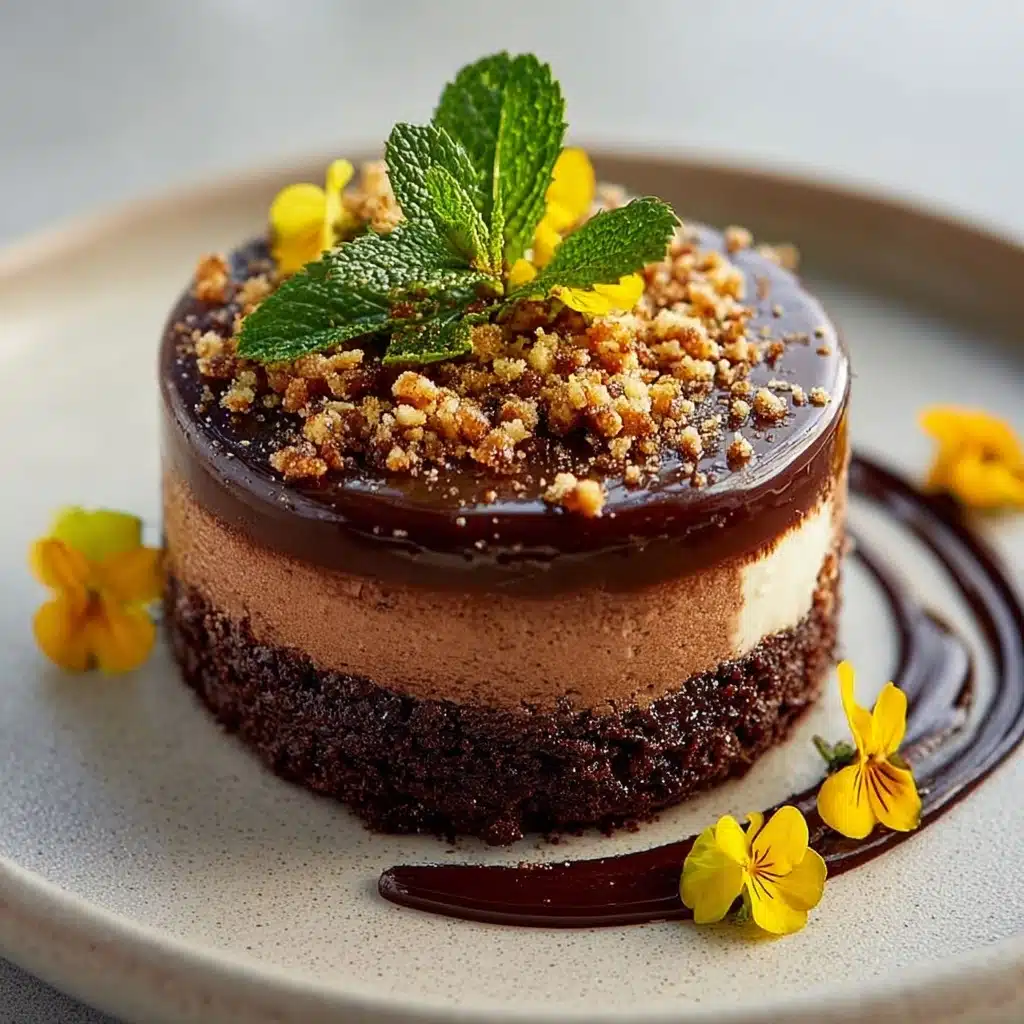
Bittersweet Dark Chocolate Mousse Cake with Silky Layers Recipe
If there’s one dessert guaranteed to leave a lasting impression, it’s the Bittersweet Dark Chocolate Mousse Cake with Silky Layers. Imagine a base of tender chocolate cake, crowned with an impossibly light yet decadently rich mousse, and finished with a flourish of elegant garnishes. Each forkful delivers sophisticated layers of texture and flavor, making this cake perfect for special occasions or when you simply need a little luxury in your life.

Ingredients You’ll Need
This recipe calls for a well-curated list of simple but utterly essential ingredients. Each one plays a starring role, whether it’s imparting chocolate depth, lending cloud-like texture, or bringing a balance of sweetness and tartness to the final bite. Let’s get familiar with the cast of characters that will make your Bittersweet Dark Chocolate Mousse Cake with Silky Layers unforgettable.
- All-purpose flour: The backbone of the cake layer, providing just the right amount of structure for a tender crumb.
- Unsweetened cocoa powder: This adds deep chocolate flavor and beautiful color to both the cake and mousse.
- Baking powder & baking soda: These leavening agents work together to make your cake rise perfectly every time.
- Salt: Just a pinch brings out and intensifies all of the other flavors.
- Brown sugar: Offers moistness and a gentle caramel note to the cake layer.
- Large eggs: Essential for structure and creating that soft, fluffy texture.
- Sour cream: The secret weapon for a tender, moist crumb and subtle tanginess that balances the rich chocolate.
- Vegetable oil: Keeps the cake moist even after chilling.
- Vanilla extract: Enhances all the chocolate notes with warmth and depth.
- Hot water or coffee: Intensifies the chocolate flavor and gives the cake layer a luxurious finish (coffee is a must if you want that extra oomph!).
- High-quality dark chocolate (70% or higher): The star of the mousse, delivering deep, bittersweet cocoa richness.
- Unsalted butter: Adds silkiness and shine to the melted chocolate base.
- Heavy cream: Whipped cream provides the mousse’s airy lift and creamy consistency.
- Powdered sugar: Sweetens the mousse just enough, ensuring balance.
- Optional toppings (shaved chocolate, cocoa, fresh berries): These make your Bittersweet Dark Chocolate Mousse Cake with Silky Layers feel extra-special and picture-perfect for serving.
How to Make Bittersweet Dark Chocolate Mousse Cake with Silky Layers
Step 1: Prep the Cake Pan and Oven
Preheat your oven to 350°F (175°C), then coat an 8-inch round cake pan with a little butter or non-stick spray and line it with parchment paper. This extra step ensures your delicate cake layer will lift out easily, staying perfect and intact for those striking layers!
Step 2: Mix the Dry Ingredients
In a large bowl, sift together the all-purpose flour, unsweetened cocoa powder, baking powder, baking soda, and salt. Sifting aerates the ingredients, breaking up any lumps and yielding a finer, more delicate cake base.
Step 3: Whisk Wet Ingredients
In a separate bowl, combine the brown sugar, eggs, sour cream, vegetable oil, and vanilla extract. Whisk until everything is smooth and well-blended; you want a luscious, glossy mixture as the base for your cake batter.
Step 4: Combine and Add Hot Liquid
Gradually add the dry ingredients to the wet mixture in batches, alternating with your hot water (or coffee for that enhanced chocolate edge). Mix only until everything is just combined—over-mixing can lead to a tougher cake, and we want every bite light and tender.
Step 5: Bake the Cake Layer
Pour your batter into the prepared cake pan and slide it into the oven. Bake for 22 to 25 minutes, or until a toothpick inserted into the center comes out clean. Let the cake cool completely in the pan—this is essential for clean, sturdy layers later on.
Step 6: Prepare the Bittersweet Dark Chocolate Mousse
Melt the chopped dark chocolate and butter together in a heatproof bowl set over barely simmering water. Stir gently until smooth, then take the bowl off the heat and let it cool to room temperature. This step is crucial, as adding cold cream to hot chocolate can cause the mousse to split.
Step 7: Whip the Cream and Fold
In a mixing bowl, whip 1 cup of the heavy cream with powdered sugar, vanilla, and a pinch of salt until soft peaks form—stop whisking once it holds gentle, cloud-like peaks. Carefully fold the cooled chocolate mixture into the whipped cream, being gentle to preserve as much air as possible.
Step 8: Add Final Whip for the Silkiest Mousse
In a separate bowl, whip the remaining 1/2 cup heavy cream until it reaches stiff peaks; this extra step creates incredible lightness. Fold it gently into your mousse mixture until no streaks remain, unveiling a stunningly velvety, airy mousse.
Step 9: Assemble and Chill
Spread the finished mousse evenly over your cooled cake layer, smoothing the top with an offset spatula or spoon. Cover and refrigerate for at least 4 hours (or overnight), allowing the mousse to fully set and the flavors to marry into a harmonious Bittersweet Dark Chocolate Mousse Cake with Silky Layers.
Step 10: Garnish and Serve
Right before serving, adorn your cake with shaved dark chocolate, a dusting of cocoa powder, or a tumble of fresh berries. Each garnish not only adds beauty but provides a lovely contrast of flavor and color.
How to Serve Bittersweet Dark Chocolate Mousse Cake with Silky Layers
Garnishes
The right garnish can elevate your Bittersweet Dark Chocolate Mousse Cake with Silky Layers from a treat to a showstopper. Think generous curls of dark chocolate for drama, a light sprinkle of cocoa powder for an elegant finish, or jewel-toned berries for a pop of tart freshness. Each choice adds its own splash of flavor and visual pizzazz.
Side Dishes
This cake is luxurious on its own, but pairing it with a scoop of vanilla bean ice cream or a dollop of whipped crème fraîche offers a creamy, cool contrast. For something lighter, a simple plate of berry salad or even a raspberry coulis can cut through the richness beautifully.
Creative Ways to Present
Let your imagination run wild! Slice the cake into slim wedges and serve on elegant dessert plates, or cut it into small squares for a sophisticated dessert buffet. For an intimate twist, try assembling the whole dessert in individual glasses—each guest gets their own miniature Bittersweet Dark Chocolate Mousse Cake with Silky Layers to savor.
Make Ahead and Storage
Storing Leftovers
If you find yourself with extra cake (lucky you!), simply cover tightly with plastic wrap or place in an airtight container. It will keep beautifully in the refrigerator for up to three days, the flavors developing even more depth and the mousse staying smooth and velvety.
Freezing
Yes, you can freeze this cake! Wrap individual slices or the whole cake tightly in plastic wrap and foil, then freeze for up to one month. Thaw overnight in the fridge for best texture. It’s a lifesaver for dinner parties or last-minute cravings when you want Bittersweet Dark Chocolate Mousse Cake with Silky Layers at the ready.
Reheating
This dessert is at its best served chilled, but if it’s been in the freezer, let it thaw slowly in the refrigerator. Avoid microwaving, as it can compromise those dreamy, silky mousse layers.
FAQs
Can I use milk chocolate instead of dark chocolate for the mousse?
Absolutely! Swapping in milk chocolate will create a sweeter and milder flavor profile. Just note that the mousse may set a touch softer since milk chocolate contains more sugar and milk solids than dark chocolate.
Is coffee necessary in the cake layer?
Not at all, but it truly deepens the cocoa flavor without making the cake taste like coffee. If you’re sensitive to caffeine or simply prefer not to use it, hot water will do the trick nicely.
How can I make the cake gluten-free?
Opt for a high-quality 1:1 gluten-free baking flour blend in place of all-purpose flour. Make sure your blend contains xanthan gum or a similar stabilizer for the best texture.
What’s the best way to achieve ultra-smooth mousse?
The secret lies in patience. Let the melted chocolate cool to just above room temperature before folding it into your whipped cream, and always use a gentle hand to keep the mousse light and airy. Taking these steps will ensure your Bittersweet Dark Chocolate Mousse Cake with Silky Layers lives up to its name!
Can I assemble the cake in advance for a special event?
Yes! In fact, preparing the cake a day ahead allows the flavors to meld and the mousse to firm up just right. Simply garnish before serving to keep everything looking fresh and glossy.
Final Thoughts
There’s something undeniably magical about sharing a homemade Bittersweet Dark Chocolate Mousse Cake with Silky Layers with loved ones. Whether you serve it as the grand finale for a dinner party or as a special treat on a quiet evening, one slice is all it takes to convert anyone into a lifelong fan. I can’t wait for you to try this recipe—your taste buds are in for an absolute treat!
PrintBittersweet Dark Chocolate Mousse Cake with Silky Layers Recipe

Indulge in the decadent delight of this Bittersweet Dark Chocolate Mousse Cake. Layers of rich chocolate cake and silky dark chocolate mousse create a luxurious dessert sure to impress.
- Prep Time: 25 minutes
- Cook Time: 25 minutes
- Total Time: 4 hours 50 minutes
- Yield: 10 servings 1x
- Category: Dessert
- Method: Baking, Chilling
- Cuisine: International
- Diet: Vegetarian
Ingredients
Cake Layer:
- 3/4 cup all-purpose flour
- 1/2 cup unsweetened cocoa powder
- 1/2 teaspoon baking powder
- 1/2 teaspoon baking soda
- 1/4 teaspoon salt
- 2/3 cup brown sugar
- 2 large eggs
- 1/3 cup sour cream
- 1/3 cup vegetable oil
- 1/2 teaspoon vanilla extract
- 1/2 cup hot water or coffee (for enhanced chocolate flavor)
Dark Chocolate Mousse:
- 8 oz high-quality dark chocolate (70% cocoa or higher), chopped
- 2 tablespoons unsalted butter
- 1 1/2 cups heavy cream, divided
- 2 tablespoons powdered sugar
- 1 teaspoon vanilla extract
- Pinch of salt
Optional Toppings:
- Shaved dark chocolate
- Cocoa powder dusting
- Fresh berries (e.g., raspberries or blackberries)
Instructions
- Preheat oven to 350°F (175°C). Grease and line an 8-inch round cake pan with parchment paper.
- In a large bowl, sift together flour, cocoa powder, baking powder, baking soda, and salt.
- In a separate bowl, whisk together brown sugar, eggs, sour cream, oil, and vanilla until smooth.
- Gradually add dry ingredients to wet ingredients, alternating with hot water (or coffee), mixing until combined.
- Pour batter into prepared pan and bake for 22–25 minutes, or until a toothpick inserted in the center comes out clean. Let cool completely.
- For the mousse, melt dark chocolate and butter in a heatproof bowl over simmering water (double boiler), stirring until smooth. Remove from heat and let cool slightly.
- In a mixing bowl, whip 1 cup heavy cream with powdered sugar, vanilla, and salt until soft peaks form.
- Fold whipped cream into the cooled melted chocolate gently until fully combined and smooth.
- In another bowl, whip the remaining 1/2 cup heavy cream until stiff peaks form and gently fold into the mousse.
- Spread mousse evenly over the cooled cake. Refrigerate at least 4 hours or overnight to set.
- Garnish with dark chocolate shavings or berries before serving.
Nutrition
- Serving Size: 1 slice
- Calories: 360 kcal
- Sugar: 22g
- Sodium: 180mg
- Fat: 24g
- Saturated Fat: 14g
- Unsaturated Fat: 8g
- Trans Fat: 0g
- Carbohydrates: 33g
- Fiber: 3g
- Protein: 5g
- Cholesterol: 70mg
Keywords: Chocolate Mousse Cake, Dark Chocolate Cake, Dessert Recipe, Chocolate Dessert