Black Forest Cheesecake** Recipe
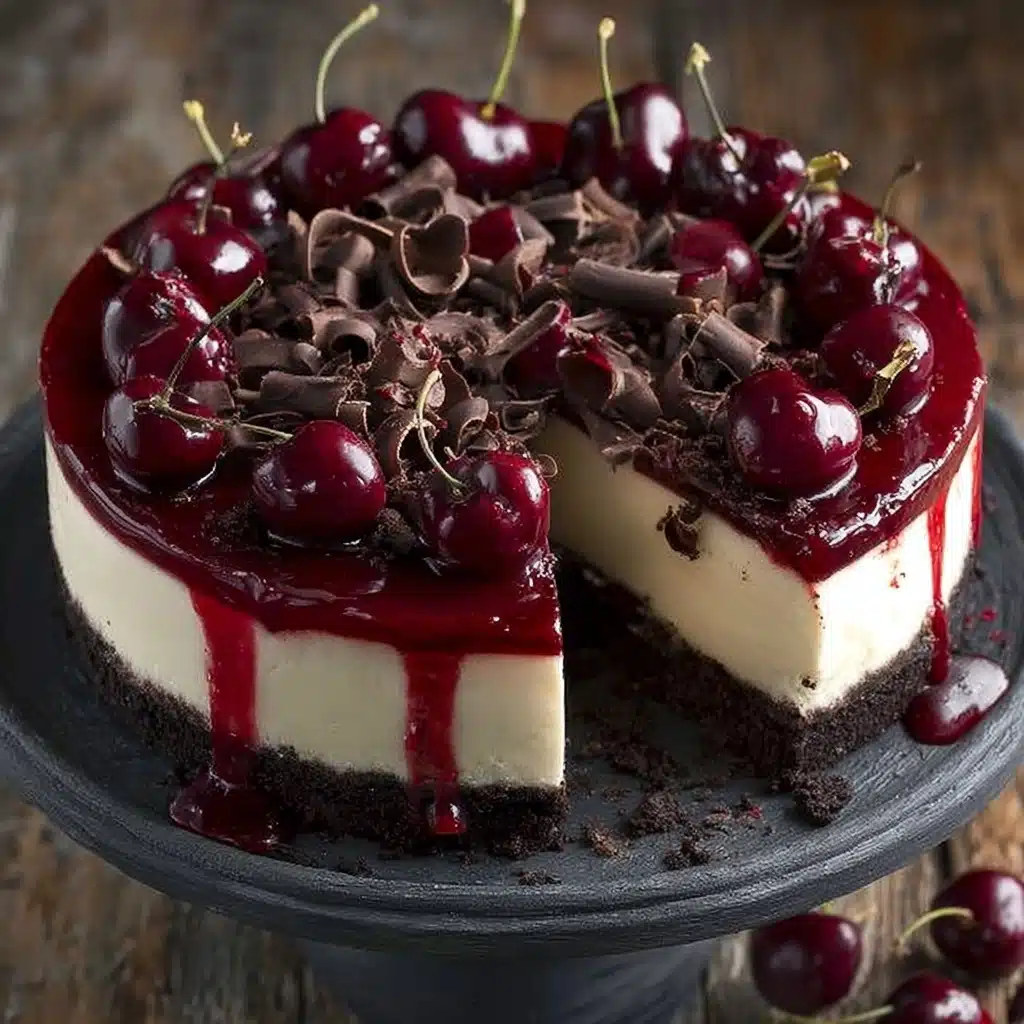
If you’re dreaming about a show-stopping, decadent dessert that always delivers pure delight, look no further than this Black Forest Cheesecake. Marrying creamy cheesecake, a fudgy chocolate cookie crust, glossy ganache, and that signature tumble of juicy cherries, this cake is a total celebration. Whether you’re making it for a festive gathering or a cozy family night, this dessert layers up those classic Black Forest flavors in a wonderfully creamy new way. You’ll love every bite of this rich, chocolatey, cherry-topped masterpiece!

Ingredients You’ll Need
The secret to an unforgettable Black Forest Cheesecake is in gathering the simplest but most perfectly matched ingredients. You’ll find that each component, from the Oreos to the cherries, plays an essential part in creating a luscious balance of flavors, textures, and color throughout the cake.
- Oreo cookies: The classic chocolate cookie brings deep cocoa notes and a pleasant crunch to the crust—be sure to crush them fine, cream filling and all.
- Unsalted butter: Melted and mixed into the crumbs, this adds richness and holds the crust together with a beautiful, golden finish.
- Cream cheese: Full-fat and softened, it’s the creamy heart of the cheesecake, providing that signature tang and silkiness.
- Granulated sugar: Sweetens the filling just enough without overpowering the chocolate and cherry highlights.
- Sour cream: Adds an extra layer of creaminess and a subtle tang that balances all the sweetness.
- Vanilla extract: Just a splash elevates all the flavors and brings a warm, aromatic note.
- Eggs: Room temperature eggs help bind everything smoothly and give the cake its luscious, delicate texture.
- Semi-sweet chocolate chips: They melt into a silky chocolate ganache, imparting a rich, bittersweet accent to each bite.
- Heavy cream: Blended with chocolate chips, it creates a glossy ganache that also adds a little dramatic drip to the presentation.
- Cherry pie filling: Those syrupy cherries are a must for bringing that Black Forest flavor flair and a splash of vibrant color to the top.
- Fresh cherries with stems: For a touch of elegance and freshness, a scattering of whole cherries looks as gorgeous as it tastes.
How to Make Black Forest Cheesecake
Step 1: Prepare the Crust
Start by setting your oven to 175°C (350°F) and wrapping a 9-inch springform pan in foil if you’d like extra leak protection. Crush your Oreo cookies until you’ve got fine crumbs, and blend them with melted butter—this is where the magic begins. Press the mixture firmly into the bottom of your pan, getting into the corners to avoid gaps. A gentle bake for 10 minutes helps it set (and fill your kitchen with chocolate aroma), then let it cool while you get ready for the next steps. Don’t forget to lower the oven temperature to 160°C (325°F) before you move on!
Step 2: Make the Cheesecake Filling
In a large bowl, begin beating the softened cream cheese and granulated sugar together until absolutely smooth and creamy—it should look billowy and glossy. Next, mix in the sour cream and vanilla extract, letting those creamy and aromatic notes really shine. The eggs go in one at a time, on a low setting, until just incorporated. Gentle is the name of the game here; overmixing brings in unwanted air bubbles. This is the foundation of our Black Forest Cheesecake, so take a moment to marvel at how luscious it looks!
Step 3: Bake the Cheesecake
It’s time for the first big transformation. Pour the cheesecake filling over the fully cooled crust, smoothing out the top. For maximum silkiness and to prevent cracking, place your springform pan in a large roasting pan. Fill the outer pan with hot water so it comes about an inch up the sides, creating a soft, steamy baking environment. Bake for 60 to 75 minutes, until the edges look set but the center still gives a little jiggle when gently shaken—don’t wait for the whole thing to look firm, or you’ll miss that perfect, creamy center!
Step 4: Cool and Chill
Resist the urge to speed things up here. After baking, turn the oven off, prop the door open slightly, and let the cheesecake cool in the gentle warmth for about an hour. This gradual drop in temperature helps prevent cracks. After that, move the pan to a wire rack and cool completely to room temperature. Cover and refrigerate for at least 6 hours, though overnight is best for full flavor development. This patient chill time makes Black Forest Cheesecake ultra-creamy and easy to slice.
Step 5: Make the Chocolate Ganache
Just before serving, whip up a simple but glorious ganache. Combine the chocolate chips and heavy cream in a heatproof bowl, then microwave in 30-second bursts, stirring each time, until everything is melted and smooth. This is the shiny, decadent blanket that gives the Black Forest Cheesecake its signature finish—like a truffle on top!
Step 6: Garnish and Serve
Remove your cheesecake from the pan (slide a knife around the edges if needed). Pour the warm ganache over the top and gently nudge it toward the edges to let it drip artfully down the sides. Spoon on the cherry pie filling, letting it tumble in the center and spill out to the edges. Dot the top with fresh cherries for extra flair. There’s something visually irresistible about those glossy red cherries perched on dark ganache—it’s irresistible. Slice and enjoy!
How to Serve Black Forest Cheesecake
Garnishes
The classic Black Forest Cheesecake deserves classic, eye-catching garnishes! Besides the must-have fresh cherries with their stems, consider grating a little dark chocolate over the top for visual drama. For extra whipped cream lovers, pipe a few pretty rosettes along the edge just before serving. Each addition brings a personal touch and a pop of elegance to every slice.
Side Dishes
Since this cheesecake is so extravagantly rich, simple sides work best. A dollop of lightly sweetened whipped cream on the plate is always delightful, or serve alongside fresh berries to balance the chocolatey sweetness. For those who adore a bit of contrast, a strong espresso or a cup of black coffee pairs beautifully, cutting through the creaminess while enhancing the chocolate and cherry notes.
Creative Ways to Present
Switch up tradition and cut the Black Forest Cheesecake into mini squares for a stunning dessert platter, or serve up elegant individual cheesecakes in mini springform pans or jars. You can even layer bite-sized chunks into parfait glasses with whipped cream and extra cherries for a modern twist. Adding a tiny mint leaf or a few chocolate curls to each serving gives it that bakery-style wow factor, perfect for impressing at celebrations.
Make Ahead and Storage
Storing Leftovers
After your celebration, simply cover any leftover Black Forest Cheesecake with plastic wrap or transfer to an airtight container. It keeps beautifully in the fridge for up to 5 days. For those who like everything extra-fresh, press a layer of parchment against the cut sides to help retain moisture and prevent the flavors from mingling with other fridge fare.
Freezing
You can absolutely freeze Black Forest Cheesecake! For best results, refrigerate the cake until fully set, then slice and wrap individual pieces tightly in plastic wrap and place them in a freezer-safe bag or container. They’ll keep for up to 2 months—just don’t add the ganache and cherry topping until you’re ready to serve for ultimate freshness and shine.
Reheating
There’s really no need to reheat cheesecake—it’s best served slightly chilled, allowing all the flavors to meld together seamlessly. If you do prefer your slice at room temperature, just let it rest on the counter for about 20 minutes before serving. This brings out the creaminess and ensures the ganache softens to that tempting, melt-in-your-mouth finish.
FAQs
Can I use a different type of chocolate for the ganache?
Absolutely! If you prefer your Black Forest Cheesecake a touch darker or sweeter, swap in bittersweet or milk chocolate chips for the ganache. Just remember, bittersweet chocolate lends extra depth, while milk chocolate adds a creamier, less intense chocolate note—both are delicious, so pick your favorite.
How do I prevent cracks in my cheesecake?
Baking your cheesecake in a water bath is the best defense against cracks—it creates gentle, even heat and avoids sudden changes in temperature. Also, avoid overmixing the eggs into the batter and let your cheesecake cool gradually in the oven with the door cracked open. Both steps help ensure a silky-smooth, beautiful result.
Does it matter if I use store-bought or homemade cherry pie filling?
Not at all! Store-bought cherry pie filling is wonderfully convenient and tastes fabulous, but if you’re in the mood to go that extra mile, a homemade cherry compote with fresh or frozen cherries brings a bright, tart punch to the Black Forest Cheesecake. The choice is yours—either way, cherries are the star!
What if I don’t have a springform pan?
A springform pan really is best for easy removal and a perfect presentation. But if you don’t have one, you can use a deep-dish pie pan or a 9-inch cake pan lined with parchment, though you’ll need to slice and serve right from the pan or carefully lift out portions. It might not be quite as tidy, but it’ll taste just as wonderful.
Can I make Black Forest Cheesecake ahead for a special event?
Yes, and it’s actually recommended! The flavors and texture develop beautifully when the cake is made a day in advance. Just prepare and chill the cheesecake, keeping the ganache and cherries separate until just before serving for the freshest look and richest taste.
Final Thoughts
There’s nothing quite like the moment you slice into a glossy, cherry-topped Black Forest Cheesecake and see that beautiful swirl of layers. Whether you’re celebrating a birthday or simply treating yourself, this cake is destined to become a new favorite. Gather your ingredients and dive in—you’re going to love every single bite!
PrintBlack Forest Cheesecake** Recipe
Indulge in the decadent delight of a Black Forest Cheesecake, combining the rich flavors of chocolate, cherries, and creamy cheesecake in every luscious bite.
- Prep Time: 30 minutes
- Cook Time: 75 minutes
- Total Time: 8 hours
- Yield: 12 servings 1x
- Category: Dessert
- Method: Baking
- Cuisine: American
- Diet: Vegetarian
Ingredients
For the Oreo crust:
- 25 Oreo cookies, crushed
- 1/2 cup (115g) unsalted butter, melted
For the cheesecake filling:
- 3 (8-ounce) packages full-fat cream cheese, softened
- 1 cup (200g) granulated sugar
- 1/2 cup (120g) sour cream
- 1 tsp vanilla extract
- 3 large eggs, room temperature
For the chocolate ganache and cherry topping:
- 1 cup (170g) semi-sweet chocolate chips
- 1/2 cup (120ml) heavy cream
- 1 (21-ounce) can cherry pie filling
- Fresh cherries with stems for garnish
Instructions
- Prepare the crust: Preheat the oven to 175°C (350°F). Mix crushed Oreo cookies and melted butter, press into a 9-inch springform pan, bake, then cool. Reduce oven temperature to 160°C (325°F).
- Make the filling: Beat cream cheese and sugar until smooth. Add sour cream, vanilla extract, and eggs one at a time. Pour over crust.
- Bake the cheesecake: Place the pan in a water bath and bake until set. Cool and chill.
- Make the ganache: Melt chocolate chips and heavy cream, then pour over chilled cheesecake.
- Garnish and serve: Top with cherry pie filling and fresh cherries before slicing and serving.
Nutrition
- Serving Size: 1 slice
- Calories: 450
- Sugar: 28g
- Sodium: 330mg
- Fat: 30g
- Saturated Fat: 17g
- Unsaturated Fat: 10g
- Trans Fat: 0g
- Carbohydrates: 38g
- Fiber: 2g
- Protein: 6g
- Cholesterol: 115mg
Keywords: Black Forest Cheesecake, Cheesecake recipe, Chocolate Cherry Cheesecake