Cherry Cheesecake Brownie Recipe
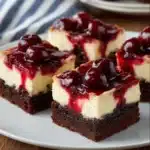
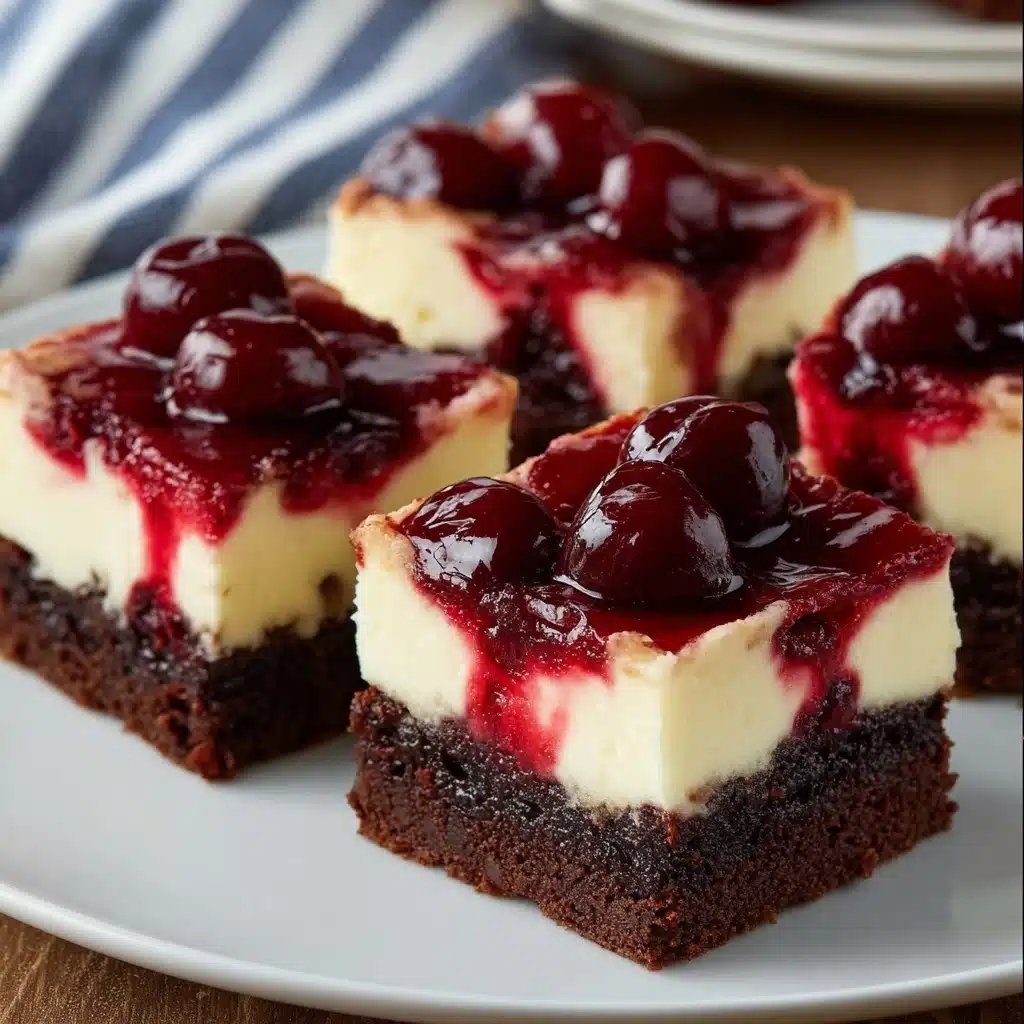
If ever there was a dessert designed to steal the spotlight at any gathering, it’s the Cherry Cheesecake Brownie. Imagine the rich, fudgy comfort of homemade brownies, layered with luscious, creamy cheesecake, and crowned with a sparkling burst of cherry pie filling. Each bite is an irresistible blend of flavors and textures—smooth, tangy, chocolatey, and just the right amount of sweet. This recipe brings together simple ingredients for a bake that looks spectacular yet comes together with delightful ease, making it an absolute favorite whether you’re impressing guests or treating yourself.
Ingredients You’ll Need
What makes Cherry Cheesecake Brownie so special is how every single ingredient plays a unique role—nothing is superfluous, and each addition helps build the dessert’s unforgettable taste and irresistible texture.
- Salted Butter: Creates a rich base for the brownies and balances the sweetness with a hint of salt.
- Cocoa Powder: Gives the brownies their deep, chocolate flavor and that dense, fudgy texture.
- Brown Sugar: Adds moisture and a subtle caramel note, ensuring the brownies stay extra soft.
- Vanilla Extract: Infuses both the brownies and cheesecake with warm, aromatic flavor.
- Eggs: Bind the ingredients together, contributing to both the creamy cheesecake layer and the chewy brownies.
- Salt: Enhances flavor and keeps the chocolate from tasting dull or flat.
- All-Purpose Flour: Provides structure to the brownies so they hold up under all that luscious filling.
- Cream Cheese: The essential cheesecake ingredient—its tang and richness are key to the filling.
- Sour Cream or Greek Yogurt: Adds a touch of tartness and silkiness to the cheesecake layer.
- Granulated Sugar: Sweetens the cheesecake and enhances its creamy texture.
- Cherry Pie Filling: The star topping that brings bright, juicy cherry flavor and a pop of color to every slice.
- Optional Whipped Cream & Maraschino Cherries: For a delightful, classic garnish that adds fun and flair.
How to Make Cherry Cheesecake Brownie
Step 1: Prepare the Brownie Batter
Start by whisking your melted butter and cocoa powder together in a big mixing bowl, then let the mixture rest for about five minutes. This little break lets the chocolate bloom, making your brownies even richer. Stir in the brown sugar and vanilla extract until everything is glossy. Beat in the eggs one by one for a smooth, thick batter. Sprinkle in the salt and gently fold in the flour just until combined. Smooth about three-quarters of the batter into a greased 9×9-inch pan, saving the rest for later magic.
Step 2: Make the Cheesecake Filling
For that dreamy cheesecake layer, beat together your room-temperature cream cheese and the sour cream or Greek yogurt until everything’s silky. This combo guarantees a creamy, tangy middle. Add in the sugar, egg, and vanilla, then blend until smooth and lump-free. The mixture should look glossy and irresistible.
Step 3: Assemble
Preheat your oven to 350°F (175°C). Pour the cheesecake filling right over your brownie base, using a spatula to gently spread it to all four corners. Next comes the dramatic bit! Drop spoonfuls of cherry pie filling evenly over the cheesecake layer—don’t worry about being too precise. Then, dollop the reserved brownie batter between the cherry spoonfuls. Using a toothpick or knife, lightly swirl everything together for that beautiful marbled effect.
Step 4: Bake
Slide your assembled masterpiece into the oven and bake for 40 to 45 minutes. You’re looking for set edges and a center that jiggles just slightly. Let it cool in the pan for at least two hours, or pop it in the fridge for clean, neat slices. This patience pays off with perfect squares every time.
Step 5: Garnish and Serve
If you’re feeling extra festive, add a swirl of whipped cream and a maraschino cherry to each piece just before serving. These simple garnishes take your Cherry Cheesecake Brownie from homemade treat to a true showstopper.
How to Serve Cherry Cheesecake Brownie
Garnishes
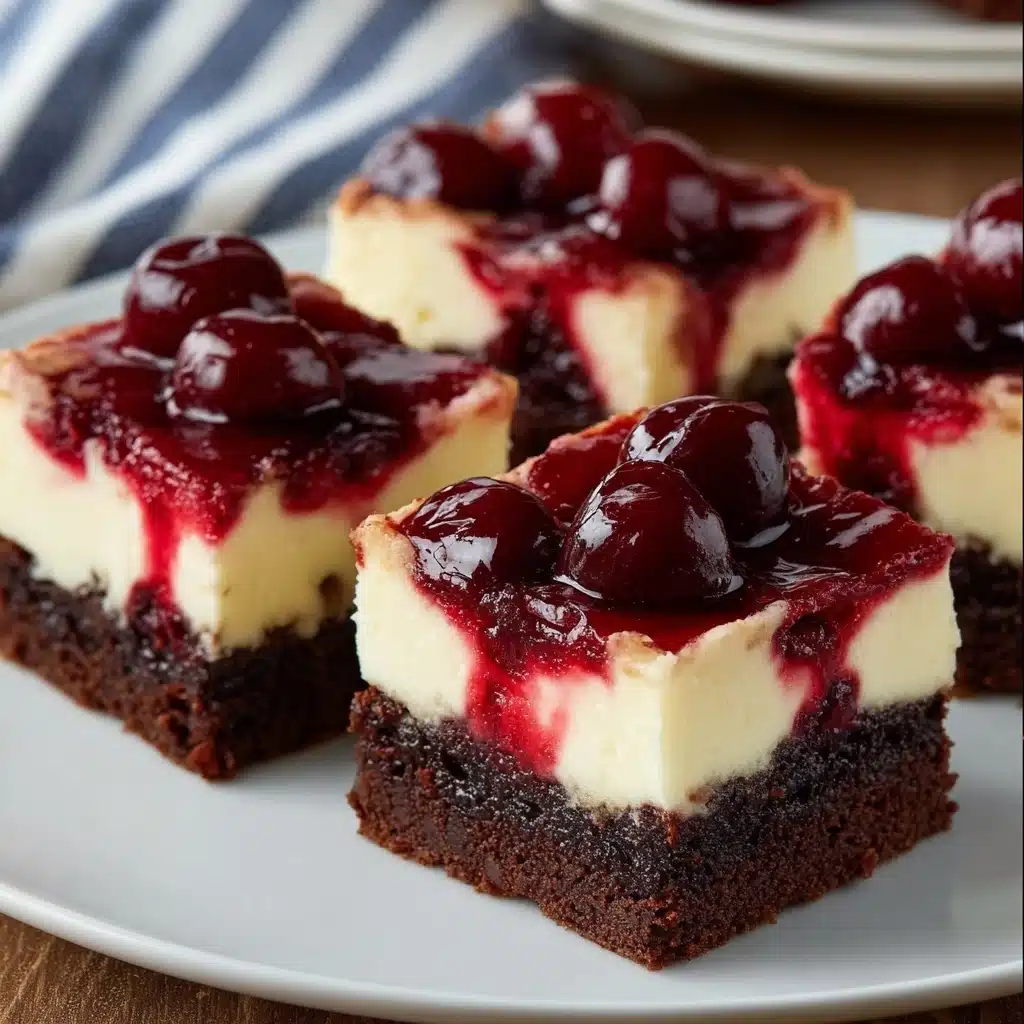
The little details matter! Just before serving, top each Cherry Cheesecake Brownie square with a cloud of whipped cream and a bright maraschino cherry or even a fresh cherry if they’re in season. This not only adds to the presentation, but also gives each bite an extra burst of creamy sweetness and color.
Side Dishes
Since these brownies are rich and packed with flavor, lighter sides work beautifully. Pair a slice with a scoop of vanilla bean ice cream for a real treat, or serve alongside a simple cup of freshly brewed coffee or black tea. For parties, set out a bowl of fresh berries to complement the cherry topping and balance the decadence.
Creative Ways to Present
Thinking beyond the pan? Try cutting the brownies into bite-sized squares and serving them on a tiered platter for an upscale dessert table. You can also cut them into rounds with a cookie cutter for elegant single-serve treats, or layer crumbled pieces into parfait glasses with extra whipped cream and cherries for a playful trifle.
Make Ahead and Storage
Storing Leftovers
If you find yourself with any Cherry Cheesecake Brownie left (a rare event!), wrap the pan tightly in foil or transfer slices to an airtight container. They’ll stay fresh and moist for up to five days in the refrigerator, making it easy to enjoy a little treat anytime.
Freezing
Cherry Cheesecake Brownie freezes surprisingly well. Once fully cooled, cut into squares and wrap each piece individually in plastic wrap, then store in a freezer-safe bag or container. When cravings hit, just thaw a brownie in the refrigerator overnight or at room temperature for a couple of hours and they’ll taste as wonderful as the day you baked them.
Reheating
If you love your brownies a little warm, pop a slice into the microwave for 10 to 15 seconds. This softens up the chocolatey layer and brings out the creamy richness of the cheesecake—just be careful not to overheat or you could lose that lovely marbled texture.
FAQs
Can I use fresh cherries instead of canned cherry pie filling?
Absolutely! While the canned filling makes things quick and easy, you can simmer fresh, pitted cherries with a little sugar and lemon juice until thickened for a homemade touch. Just let the mixture cool before swirling it into your cheesecake brownie layer.
Do I need to use a 9×9-inch pan or can I substitute a different size?
A 9×9-inch pan gives you the perfect thickness for each layer, but you can use an 8×8-inch pan for taller brownies (just add a few extra minutes to the bake time). For a thinner bar, go for a 9×13-inch pan and reduce baking time to avoid overbaking.
Is it possible to make Cherry Cheesecake Brownie gluten-free?
Yes! Swap the all-purpose flour with your favorite gluten-free flour blend. Make sure the blend includes xanthan gum for structure and check that your other ingredients are gluten-free as well.
Can I prepare Cherry Cheesecake Brownie in advance for a party?
Definitely. This dessert is even better after chilling, so feel free to make it a day ahead. Store it covered in the fridge and garnish just before serving for best freshness and appearance.
What’s the best way to get clean slices?
For picture-perfect squares, chill your Cherry Cheesecake Brownie completely, then use a sharp knife dipped in hot water (and wiped dry) between every cut. This helps glide through each layer without smudging or sticking.
Final Thoughts
I promise, once you sink your fork into a Cherry Cheesecake Brownie, it’ll instantly earn a spot among your go-to desserts. Whether for a festive occasion or a “just because” kind of night, this treat brings smiles every time. Happy baking, and don’t forget to savor every cherry-topped bite!
PrintCherry Cheesecake Brownie Recipe
Indulge in the decadent combination of rich chocolate brownies and creamy cheesecake with a fruity twist in this Cherry Cheesecake Brownie recipe. Perfect for satisfying your sweet tooth cravings!
- Prep Time: 20 minutes
- Cook Time: 45 minutes
- Total Time: 1 hour 5 minutes
- Yield: 9 servings 1x
- Category: Dessert
- Method: Baking
- Cuisine: American
- Diet: Vegetarian
Ingredients
For the Brownies
- 1/2 cup salted butter, melted
- 1/2 cup cocoa powder
- 1 cup brown sugar
- 1 tsp vanilla extract
- 2 large eggs
- 1 tsp salt
- 1 cup all-purpose flour
For the Cheesecake Filling
- 8 oz cream cheese, at room temperature
- 1/4 cup sour cream or Greek yogurt
- 1/3 cup granulated sugar
- 1 large egg
- 1 tsp vanilla extract
- 1 (21 oz) can cherry pie filling (use 1/2 can for a shorter bake)
Optional Garnish
- Whipped cream
- Maraschino cherries
Instructions
- Prepare the Brownie Batter – In a mixing bowl, whisk melted butter and cocoa powder; let rest for 5 minutes. Add brown sugar and vanilla, stirring smooth. Beat in eggs one at a time, then fold in salt and flour. Spread 3/4 of the batter into a greased 9×9-inch pan, reserving the rest.
- Make the Cheesecake Filling – Beat cream cheese with sour cream until smooth. Add sugar, egg, and vanilla, blending until creamy.
- Assemble – Preheat oven to 350°F (175°C). Pour cheesecake filling over the brownie base. Drop spoonfuls of cherry pie filling evenly spaced across the surface. Add the reserved brownie batter between cherries and swirl with a toothpick for a marbled look.
- Bake – Bake for 40–45 minutes until edges set and the center slightly jiggles. Cool 2–3 hours in the pan or refrigerate for neat slices.
- Optional Garnish – Add whipped cream and maraschino cherries before serving.
Nutrition
- Serving Size: 1 slice
- Calories: 320
- Sugar: 24g
- Sodium: 260mg
- Fat: 18g
- Saturated Fat: 10g
- Unsaturated Fat: 6g
- Trans Fat: 0g
- Carbohydrates: 36g
- Fiber: 1g
- Protein: 5g
- Cholesterol: 85mg
Keywords: Cherry Cheesecake Brownie, dessert, cheesecake, brownie, cherry, chocolate

