Chocolate Marshmallow Ice Cream Cone Recipe
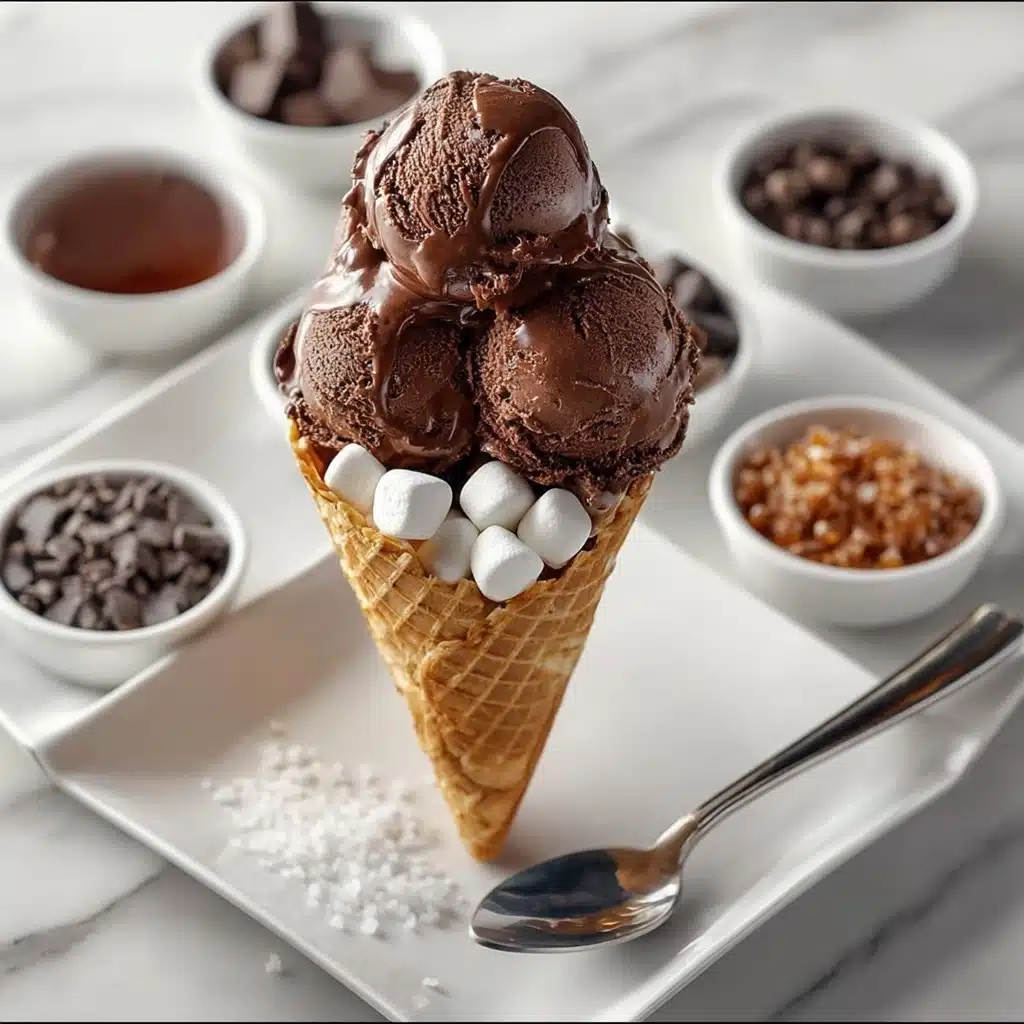
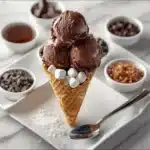
If you’re ready to level up your dessert game, you simply have to try this Chocolate Marshmallow Ice Cream Cone Recipe. Imagine ultra-creamy, intensely chocolatey ice cream studded with gooey marshmallows, piled high in a crisp waffle cone, and finished with your favorite toppings. It’s nostalgia and gourmet decadence in one glorious summertime treat, guaranteed to wow guests or delight the kid in all of us. The blend of rich chocolate and playful marshmallow, plus a scoop (or three), makes this recipe impossible to resist!
Ingredients You’ll Need
This Chocolate Marshmallow Ice Cream Cone Recipe keeps things straightforward, but every ingredient plays a starring role in building big flavor and the silkiest texture. Here’s what you’ll need and why each matters:
- Heavy cream: Creates that luxuriously smooth and creamy base that makes homemade ice cream unbeatable.
- Whole milk: Balances out the richness so your ice cream is scoopable but not too dense.
- Sugar: Adds just the right sweetness and helps give the ice cream that soft, creamy finish.
- Unsweetened cocoa powder: Boosts the intensity of the chocolate flavor and gives a deep, chocolate-brown hue.
- Dark chocolate (chopped): Melts into the custard for a layered, rich chocolate taste—feel free to use a high-quality bar!
- Egg yolks: Provide body and a luscious, custard-like texture.
- Vanilla extract: Rounds out the chocolate and adds a subtle warmth.
- Pinch of salt: Makes every chocolate note pop and keeps the sweetness in check.
- Waffle cones: The classic vessel—super crisp, with a gentle sweetness that complements the ice cream.
- Mini marshmallows: Provide bursts of gooey texture (layered both inside and on top!).
- Optional toppings: Try chocolate chips, caramel drizzle, cocoa nibs, or crushed cookies for extra indulgence and fun.
How to Make Chocolate Marshmallow Ice Cream Cone Recipe
Step 1: Make the Chocolate Base
Start by combining the milk, cream, sugar, unsweetened cocoa powder, and a pinch of salt in a saucepan. Gently heat the mixture, stirring often, just until it’s warm—don’t let it boil. In a separate bowl, whisk the egg yolks until they’re a bit lighter and slightly thick. Gradually pour in a bit of the warm milk mixture, whisking constantly to temper the yolks (this keeps them from scrambling!). Slowly return everything to the saucepan and cook over low heat, stirring nonstop, until the mixture thickens enough to coat the back of a spoon. Turn off the heat and add the chopped dark chocolate and vanilla extract, stirring until smooth and shiny.
Step 2: Chill the Mixture
Pour your chocolate custard into a clean bowl, cover with plastic wrap (make sure it touches the surface), and pop it in the fridge for at least 4 hours. Overnight chilling is even better; the flavors develop beautifully as it rests, ensuring your Chocolate Marshmallow Ice Cream Cone Recipe is next-level delicious.
Step 3: Churn the Ice Cream
Once the mixture is thoroughly chilled, pour it into your ice cream maker and churn according to manufacturer’s instructions. It should take about 20 to 25 minutes to reach a creamy, soft-serve consistency. Scoop the churned ice cream into a lidded container and freeze for another 2 to 3 hours, so it’s perfectly scoopable and holds up when loaded into cones.
Step 4: Assemble the Cones
Here’s the fun part! Place a layer of mini marshmallows inside each waffle cone to create a pillowy surprise at the base. Add up to three generous scoops of your homemade chocolate ice cream on top, then pile on even more mini marshmallows and any favorite toppings you like—think chocolate chips, crushed cookies, or drizzles of caramel. For s’mores-lovers, lightly torch the marshmallows for crackly, golden perfection. Enjoy immediately!
How to Serve Chocolate Marshmallow Ice Cream Cone Recipe

Garnishes
Let your creativity shine! Dress up your Chocolate Marshmallow Ice Cream Cone Recipe with billowy clouds of mini marshmallows, a rain of chocolate chips, decadent caramel drizzle, crunchy cocoa nibs, or a sprinkle of crushed cookies. For an extra-special treat, use a small kitchen torch to toast the marshmallows right on top—think campfire s’mores but oh-so-much cooler.
Side Dishes
If you’re serving a crowd or making this for a party, pair your ice cream cones with a platter of fresh berries, homemade chocolate-dipped pretzels, or brownie bites. These sides add color, variety, and even more fun to the whole ice cream experience.
Creative Ways to Present
Transform dessert into a DIY ice cream bar! Set out bowls of toppings, extra marshmallows, and cones so everyone can build their dream sundae on a cone. For a twist, serve scoops of the chocolate marshmallow ice cream between two cookies for a next-level ice cream sandwich, or wedge them into mason jars layered with all your favorite garnishes.
Make Ahead and Storage
Storing Leftovers
If you have leftover ice cream (a rare event!), transfer it to an airtight container and press a piece of parchment directly onto the surface before sealing. This helps prevent ice crystals and keeps the texture fabulously creamy for up to one week.
Freezing
The homemade chocolate marshmallow ice cream stores beautifully in the freezer for up to a week. Longer storage is possible, but flavors are best when enjoyed within seven days—the marshmallows may begin to harden after that. Keep cones and toppings separate until you’re ready to serve for maximum crunch and gooeyness.
Reheating
No need to reheat, but if your ice cream becomes too hard in the freezer, let it sit at room temperature for 5–10 minutes before scooping. This makes it silky smooth again and perfect for loading into cones.
FAQs
Can I make the Chocolate Marshmallow Ice Cream Cone Recipe without an ice cream maker?
Absolutely! Simply freeze the custard mixture in a shallow dish and stir every 30 to 45 minutes until the ice cream is creamy. It won’t be quite as airy as the churned version, but the flavor is still out-of-this-world delicious.
Can I use milk chocolate instead of dark chocolate?
Yes! If you love your ice cream a bit sweeter and gentler, swap in milk chocolate and adjust sugar down slightly to taste. The recipe is super flexible so you can tune it to your ideal level of chocolate bliss.
What’s the best way to toast marshmallows for this recipe?
A small kitchen torch is perfect for quickly toasting marshmallows on top of the cone (carefully, of course). You can also use a broiler, watching closely, but be sure to do this step just before serving so the marshmallows are toasty and gooey.
How can I make this recipe gluten-free?
The homemade ice cream itself is gluten-free! Just choose gluten-free cones or skip the cone and serve scoops in bowls. All your favorite toppings can usually be found gluten-free, too—check your labels to be sure.
Can I prepare the Chocolate Marshmallow Ice Cream Cone Recipe ahead for a party?
Yes! Make the ice cream base and freeze up to a week ahead. Then, at serving time, simply scoop into cones and let guests pile on marshmallows and toppings at a build-your-own station. It’s a fantastic party activity—and guaranteed crowd-pleaser!
Final Thoughts
There’s pure magic in a homemade Chocolate Marshmallow Ice Cream Cone Recipe—rich, creamy chocolate, irresistible toasted marshmallow, and all those topping possibilities! It’s truly one of those desserts that brings out everyone’s inner child. If you love a little nostalgia served with your homemade gourmet, give this recipe a try—you’ll be making happy memories with every cone!
PrintChocolate Marshmallow Ice Cream Cone Recipe
Indulge in the rich and creamy delight of chocolate marshmallow ice cream cones. This recipe combines the goodness of homemade chocolate ice cream with the fun of assembling it in a waffle cone with mini marshmallows and various toppings.
- Prep Time: 20 minutes
- Cook Time: 15 minutes
- Total Time: 6 hours 35 minutes
- Yield: 6 servings 1x
- Category: Dessert
- Method: Churning, Mixing, Assembling
- Cuisine: American
- Diet: Vegetarian
Ingredients
For the Ice Cream:
- 2 cups (500 ml) heavy cream
- 1 cup (250 ml) whole milk
- ¾ cup (150 g) sugar
- ½ cup (50 g) unsweetened cocoa powder
- 150 g dark chocolate (chopped)
- 4 large egg yolks
- 1 tsp vanilla extract
- Pinch of salt
For Assembly:
- Waffle cones
- Mini marshmallows
- Optional toppings: chocolate chips, caramel drizzle, cocoa nibs, or crushed cookies
Instructions
- Make the Chocolate Base – In a saucepan, whisk together milk, cream, sugar, cocoa powder, and salt. Heat gently until warm (do not boil). In a bowl, whisk egg yolks until slightly thick. Slowly add some of the warm mixture to the yolks while whisking (to temper). Return everything to the saucepan and cook over low heat, stirring constantly, until it thickens and coats the back of a spoon. Remove from heat and stir in chopped dark chocolate until melted and smooth. Add vanilla extract.
- Chill the Mixture – Pour into a bowl, cover, and refrigerate for at least 4 hours (overnight for best flavor).
- Churn the Ice Cream – Pour into your ice cream maker and churn until creamy. Transfer to a container and freeze for 2–3 hours until scoopable.
- Assemble the Cones – Place mini marshmallows inside the cone to create a cushion. Add 3 scoops of chocolate ice cream on top. Garnish with more marshmallows and toppings of choice.
Notes
- Toast the marshmallows lightly with a kitchen torch for a s’mores-style cone.
- For extra indulgence, drizzle with hot fudge before serving.
- You can swap dark chocolate for milk chocolate if you prefer a sweeter version.
Nutrition
- Serving Size: 1 cone
- Calories: 390
- Sugar: 28g
- Sodium: 90mg
- Fat: 26g
- Saturated Fat: 16g
- Unsaturated Fat: 8g
- Trans Fat: 0g
- Carbohydrates: 34g
- Fiber: 3g
- Protein: 5g
- Cholesterol: 145mg
Keywords: chocolate ice cream, marshmallow, waffle cone, dessert recipe