Decadent Layers of Godiva Chocolate Cheesecake Bliss Recipe
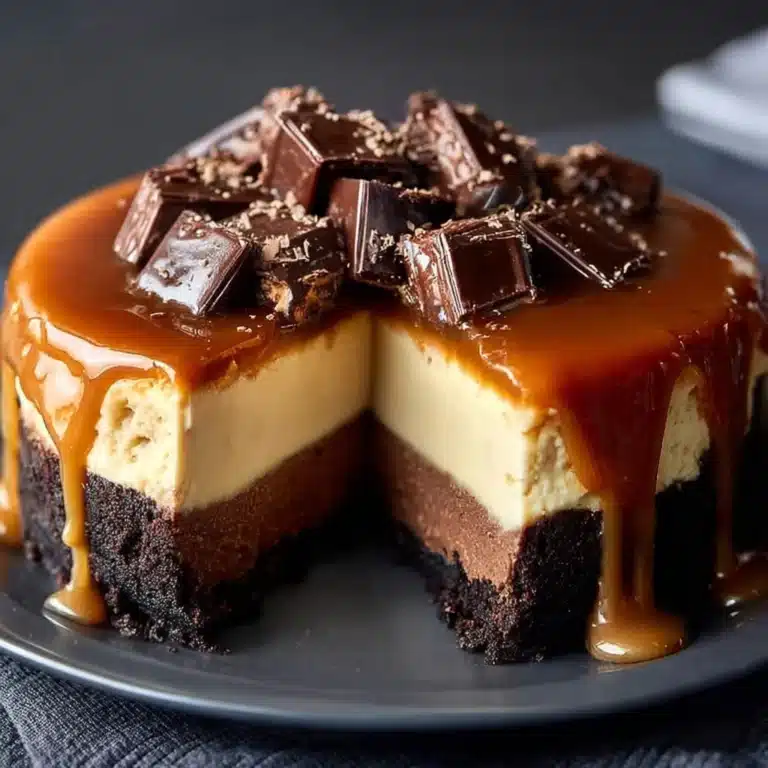
When it comes to crafting a show-stopping dessert that draws a crowd and delivers an unforgettable experience, nothing compares to Decadent Layers of Godiva Chocolate Cheesecake Bliss. Imagine sinking your fork through four luscious layers – a fudgy brownie, a silken chocolate cheesecake, a cloud of chocolate mousse, and a glossy ganache – all built with the world-class indulgence of Godiva chocolate. Each bite is a symphony of textures and chocolate intensity that will have everyone talking, whether you’re celebrating a milestone occasion or just treating yourself to a bit of luxury at home!
Ingredients You’ll Need

Ingredients You’ll Need
Gathering your ingredients for Decadent Layers of Godiva Chocolate Cheesecake Bliss is easier than you might think, and every component is recommended for a reason – from the rich cream cheese and Godiva chocolate to the humble flour and eggs. These carefully chosen staples meld into an opulent treat where every bite balances depth, silkiness, and just the right touch of sweetness.
- Unsalted Butter (1 cup): The backbone of the brownie base, creating that signature fudgy texture with a melt-in-your-mouth finish.
- Granulated Sugar (2 cups + 1 cup): Sweetens both the brownie and cheesecake layers, adding structure and a classic sweetness.
- Unsweetened Cocoa Powder (1 cup): Delivers pure, intense chocolate flavor to the brownie base.
- Large Eggs (4 for brownie, 3 for cheesecake): Vital for binding the batters and adding extra richness to both the brownie and cheesecake layers.
- All-Purpose Flour (1 cup): Adds just enough structure to keep the brownie dense but pliant under your fork.
- Vanilla Extract (2 tsp): One teaspoon each for the brownie and cheesecake, this subtle flavor booster brings harmony to the chocolate intensity.
- Salt (1/2 tsp): Just a pinch to balance sweetness and enhance the chocolate notes.
- Cream Cheese (24 oz): The heart of the cheesecake layer, lending unrivaled creaminess and tang.
- Sour Cream (1 cup): Creates a silky, slightly tangy lift in the cheesecake for balance and moisture.
- Melted Godiva Dark Chocolate (8 oz for cheesecake): The secret to the ultra-decadent, unmistakably gourmet chocolate essence in the cheesecake layer.
- Melted Godiva Milk Chocolate (8 oz for mousse): Brings a mellow, creamy chocolate flavor and a dreamy mouthfeel to the mousse layer.
- Heavy Whipping Cream (2 cups for mousse + 1 cup for ganache): Whips up into soft peaks for the mousse and creates an irresistibly smooth ganache topping.
- Powdered Sugar (1/2 cup): Adds just enough sweetness to keep the mousse light and balanced.
- Godiva Dark Chocolate (8 oz for ganache): Turns into the glossy, photogenic finish that crowns the entire dessert.
- Shaved Chocolate or Cocoa Powder: Perfect for garnish, adding elegance and a hint of texture with every slice.
How to Make Decadent Layers of Godiva Chocolate Cheesecake Bliss
Step 1: Prepare the Brownie Base
Start by preheating your oven to 350°F (175°C) and lining a 9-inch springform pan – this ensures an easy release and those clean layer lines everyone admires. Melt the butter until just liquid, then whisk in the sugar and cocoa powder until you have a glossy, thick mix. Work in the eggs one at a time for maximum silkiness. Gently fold in the flour, vanilla extract, and salt, taking care not to overmix. Pour this decadent batter into your pan, smoothing it evenly. Bake for 20-25 minutes, just until set but still a touch fudgy in the center. Set aside to cool completely, letting the brownie form a sturdy, irresistible base for your layers.
Step 2: Mix and Bake the Chocolate Cheesecake Layer
Reduce your oven temperature to 325°F (160°C) – the lower heat ensures the cheesecake bakes gently and retains its creamy texture. In a large bowl, beat the softened cream cheese with sugar until perfectly smooth. Blend in the sour cream, then add the eggs, one at a time, fully incorporating after each addition. Stir in the vanilla and fold in your Luxurious melted Godiva dark chocolate until you see those signature streaks turn to a solid, rich brown. Pour the cheesecake filling over the cool brownie base, giving it a gentle tap to release any air bubbles. Bake for 50-55 minutes, just until the center is barely set. Allow the cheesecake to cool before chilling in the refrigerator for at least 4 hours – patience is crucial for those Decadent Layers of Godiva Chocolate Cheesecake Bliss to truly meld together!
Step 3: Whip Up the Chocolate Mousse Layer
After your cheesecake is beautifully chilled and firm, set your sights on the cloud-like chocolate mousse. In a clean bowl, beat the heavy cream and powdered sugar until soft peaks form – think pillowy and billowy, not stiff. Next, gently fold in the cooled, melted Godiva milk chocolate until just combined. The result should be airy, light, and irresistible. Spread this mousse evenly over the chilled cheesecake layer, smoothing the top with an offset spatula for a professional finish. Refrigerate again for 2-3 hours, letting that mousse set and invite the next level of bliss.
Step 4: Finish with the Ganache Topping
For that crowning touch, bring your heavy cream to just below a boil, then pour it over chopped Godiva dark chocolate in a heatproof bowl. Wait a moment as the chocolate softens, then stir gently until the ganache is smooth, glossy, and deeply seductive. Let it cool a few minutes so it thickens just slightly, then pour it over the mousse layer, letting it flow to the edges in a mesmerizing sheen. Return your masterpiece to the refrigerator one last time so the layers settle into pure Decadent Layers of Godiva Chocolate Cheesecake Bliss.
How to Serve Decadent Layers of Godiva Chocolate Cheesecake Bliss
Garnishes
The final flourish for your showstopper? Think chocolate curls, a gentle dusting of cocoa powder, or even a Godiva truffle perched artfully atop each slice. These little touches turn an extraordinary dessert into a true celebration of Decadent Layers of Godiva Chocolate Cheesecake Bliss, enticing eyes and taste buds alike.
Side Dishes
Serve each wedge with a dollop of freshly whipped cream, a handful of ripe raspberries, or a scoop of vanilla bean ice cream. The light tang of berries or cream beautifully balances the rich decadence, making every bite of this blissful dessert even more memorable.
Creative Ways to Present
For that wow factor, slice extra-thin pieces and fan them on a platter for a party, serve in individual domes for a high-end dinner, or layer diced pieces with whipped cream in elegant glasses for a colorful parfait. However you serve it, these Decadent Layers of Godiva Chocolate Cheesecake Bliss transition effortlessly from formal to casual occasions.
Make Ahead and Storage
Storing Leftovers
Your masterpiece keeps beautifully in the refrigerator for up to five days. Store uncovered for the first hour to allow the ganache to set, then cover tightly with plastic wrap or a cake dome to preserve freshness and that signature chocolate aroma. Each slice will taste just as amazing on day five as it does the first!
Freezing
If you need to plan further ahead, wrap individual slices or the entire cheesecake (without garnish) tightly in plastic wrap and a layer of foil. Freeze for up to two months. When a chocolate craving strikes, thaw overnight in the fridge and freshen with your favorite garnishes before serving. The layers maintain their beautiful integrity and bold flavor.
Reheating
While this cheesecake is best enjoyed chilled, if you want to revive the ganache or take the chill off, let slices sit at room temperature for about 20 minutes before serving. Avoid microwaving, as it can melt the mousse and upset those meticulous Decadent Layers of Godiva Chocolate Cheesecake Bliss.
How to Serve

Serve this delicious recipe with your favorite sides.
FAQs
Can I use another brand of chocolate if I can’t find Godiva?
You certainly can, but the signature flavor and creamy texture of the Decadent Layers of Godiva Chocolate Cheesecake Bliss come directly from premium Godiva chocolate. Any high-quality chocolate will work, but for that extra-luxurious experience, try to hunt down Godiva.
Can I make this cheesecake gluten-free?
Yes! Substitute your favorite 1:1 gluten-free all-purpose flour blend for the regular flour in the brownie base. Make sure every other ingredient (including chocolate) is certified gluten free for complete peace of mind.
How do I know when the cheesecake layer is baked perfectly?
The cheesecake is ready when the edges look set but the middle has a gentle wobble. It will continue to set as it cools and chills. This magic moment creates the creamy, dreamy texture that defines Decadent Layers of Godiva Chocolate Cheesecake Bliss.
What’s the best way to get clean slices?
For picture-perfect slices, dip a long, sharp knife in hot water and wipe it dry before each cut. The heat slices effortlessly through each layer, keeping those Decadent Layers of Godiva Chocolate Cheesecake Bliss distinct and gorgeous.
Can I make this recipe ahead for a party?
Absolutely! This dessert is best when chilled for several hours or overnight, so make it a day or two ahead. It frees up your kitchen and ensures every layer is settling into pure bliss before serving time.
Final Thoughts
Dive in and treat yourself – and your loved ones – to the unforgettable experience of making Decadent Layers of Godiva Chocolate Cheesecake Bliss. Every moment spent crafting these layers is rewarded tenfold when you slice through and see those perfect striations of chocolate waiting to be devoured. Let this be the dessert that sparks celebration, conversation, and many returns to the recipe card. Enjoy every decadent, blissful bite!
PrintDecadent Layers of Godiva Chocolate Cheesecake Bliss Recipe

Indulge in the ultimate chocolate lover’s dream with this decadent Godiva Chocolate Cheesecake. Layers of rich brownie base, creamy chocolate cheesecake, silky mousse, and a luxurious ganache topping come together to create a show-stopping dessert that will impress any crowd.
- Prep Time: 40 minutes
- Cook Time: 1 hour 20 minutes
- Total Time: 8 hours
- Yield: 12 slices 1x
- Category: Dessert
- Method: Baking
- Cuisine: American
- Diet: Vegetarian
Ingredients
Brownie Base:
- 1 cup (2 sticks) unsalted butter
- 2 cups granulated sugar
- 1 cup unsweetened cocoa powder
- 4 large eggs
- 1 cup all-purpose flour
- 1 tsp vanilla extract
- 1/2 tsp salt
Chocolate Cheesecake Layer:
- 24 oz cream cheese, softened
- 1 cup granulated sugar
- 1 cup sour cream
- 3 large eggs
- 8 oz melted Godiva dark chocolate
- 1 tsp vanilla extract
Mousse Layer:
- 8 oz Godiva milk chocolate, melted and cooled
- 2 cups heavy whipping cream
- 1/2 cup powdered sugar
Ganache Topping:
- 8 oz Godiva dark chocolate
- 1 cup heavy cream
- Shaved chocolate or cocoa powder (for garnish)
Instructions
- Preheat oven and prepare pan: Preheat oven to 350°F (175°C). Grease and line a 9-inch springform pan.
- Make Brownie Base: Melt butter, then whisk in sugar and cocoa powder. Add eggs, flour, vanilla, and salt. Bake and cool.
- Prepare Cheesecake Layer: Beat cream cheese and sugar, add sour cream, eggs, vanilla, and melted chocolate. Pour over brownie base and bake.
- Make Mousse Layer: Beat cream and sugar, fold in melted milk chocolate. Spread over chilled cheesecake.
- Prepare Ganache Topping: Heat cream, pour over chocolate, stir until smooth. Pour over mousse layer and chill.
- Garnish and Serve: Decorate with chocolate curls or cocoa powder before serving.
Notes
- For best results, chill the cheesecake overnight to allow flavors to meld.
- Feel free to customize the toppings with fresh berries or chopped nuts.
- Ensure all dairy ingredients are at room temperature for smooth incorporation.
Nutrition
- Serving Size: 1 slice
- Calories: 595 kcal
- Sugar: 38g
- Sodium: 320mg
- Fat: 42g
- Saturated Fat: 25g
- Unsaturated Fat: 14g
- Trans Fat: 0g
- Carbohydrates: 53g
- Fiber: 3g
- Protein: 8g
- Cholesterol: 165mg
Keywords: cheesecake, chocolatedessert, homemadecheesecake, decadentdesserts, copycatrecipes, godivachocolate, browniebase, moussecake, ganache, gourmetdesserts, luxurydessert, partyrecipes, finedining, indulgence, specialoccasioncake, chocolatefix, celebrationcake, chocolatecheesecake, richdesserts, sweettooth