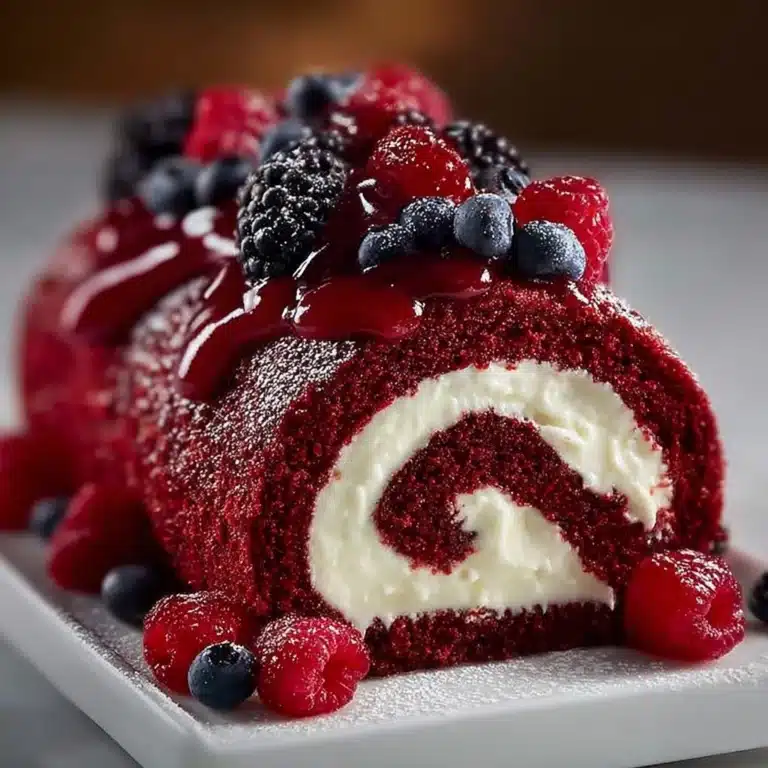
Red Velvet Marble Loaf Cake Recipe
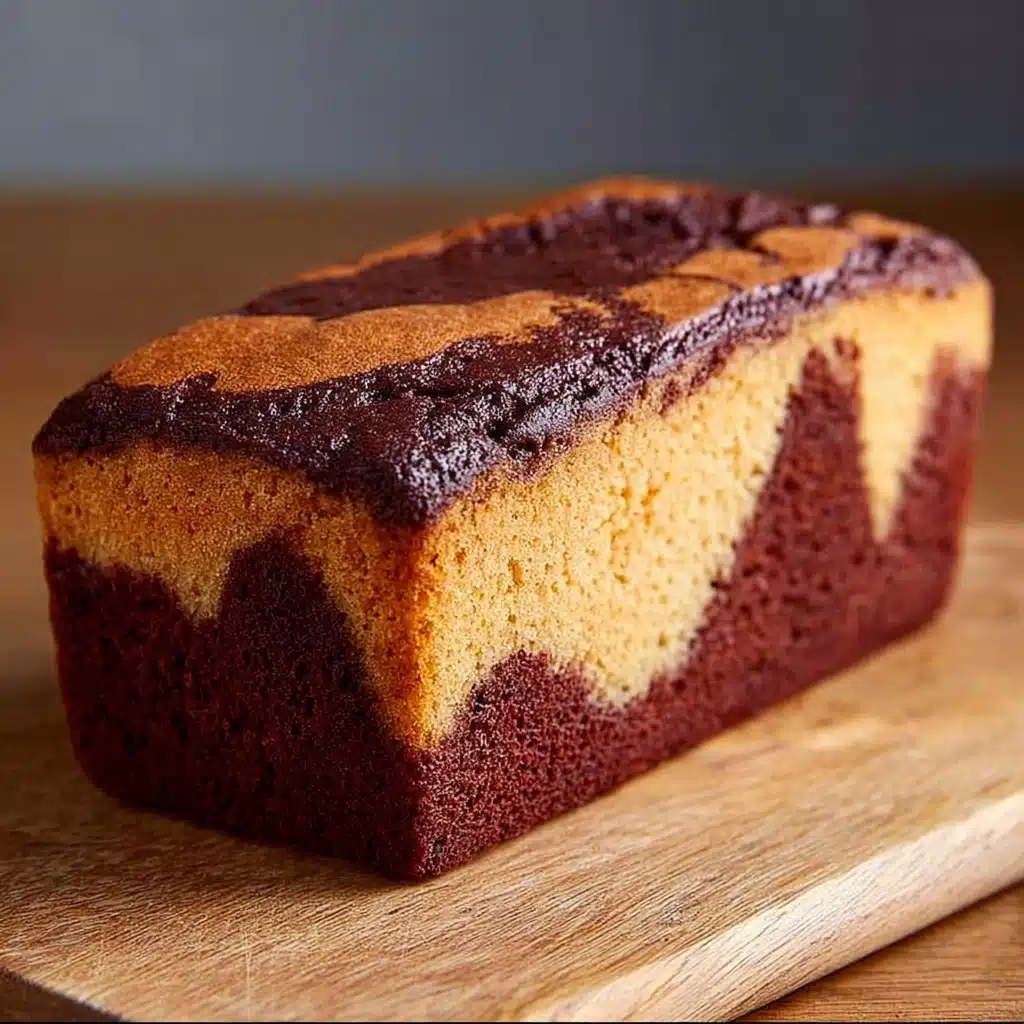
The magic of the Red Velvet Marble Loaf Cake lies in its enchanting swirl of rich red velvet and subtle cocoa flavors, all baked into a moist loaf that’s as stunning as it is delicious. This cake beautifully combines the classic smooth texture you expect from red velvet with a delicate marble effect, making it a perfect showstopper for any occasion. Whether you’re a seasoned baker or trying your hand at something new, this Red Velvet Marble Loaf Cake offers the perfect balance of ease and elegance that will have everyone asking for seconds.

Ingredients You’ll Need
Gathering simple and quality ingredients is the first step to nailing the perfect Red Velvet Marble Loaf Cake. Each ingredient plays a critical role in creating that iconic flavor, texture, and vibrant color that makes this cake so irresistible.
- All-purpose flour (2 cups | 250g): Provides the structure and tenderness for the cake’s crumb.
- Baking powder (1 ½ tsp): Gives the loaf its gentle rise for a light texture.
- Baking soda (½ tsp): Reacts with the vinegar and buttermilk to enhance the cake’s airy softness.
- Salt (½ tsp): Balances sweetness and deepens flavor.
- Unsalted butter (½ cup | 115g), softened: Brings richness and a melt-in-your-mouth feel.
- Sugar (1 cup | 200g): Sweetens and adds moisture to keep the cake tender.
- Large eggs (2): Bind ingredients and add moisture, ensuring a perfect crumb.
- Buttermilk (1 cup | 240ml): Adds tanginess and helps keep the loaf moist; can substitute with milk plus vinegar.
- Vanilla extract (2 tsp): Enhances overall flavor with a warm, aromatic note.
- Cocoa powder (2 tbsp | 15g): Essential for that classic red velvet chocolate hint without overpowering.
- Red food coloring (1 tbsp): Delivers the signature vibrant red color that makes this cake a showstopper.
- White vinegar (2 tsp): Reacts with baking soda for lift and adds a subtle brightness to the flavor.
How to Make Red Velvet Marble Loaf Cake
Step 1: Prepare Your Oven and Pan
Start by preheating your oven to 175°C (350°F). This ensures your cake bakes evenly right from the start. Grease a 9×5-inch loaf pan thoroughly and line it with parchment paper to prevent sticking and make for easy removal once baked.
Step 2: Mix Your Dry Ingredients
In a medium bowl, whisk together the all-purpose flour, baking powder, baking soda, salt, and cocoa powder. Combining these ingredients separately helps distribute the leaveners and cocoa evenly throughout your batter for consistent flavor and texture.
Step 3: Cream Butter and Sugar
In a large bowl, beat the softened butter and sugar together until the mixture is fluffy and light in color. This step is crucial to create a tender crumb in your Red Velvet Marble Loaf Cake. Once fluffy, add eggs one at a time, beating well after each addition to incorporate air and moisture, then stir in vanilla extract for added aroma.
Step 4: Combine Wet and Dry Ingredients
Add your dry ingredients to the butter mixture in three parts, alternating with the buttermilk, starting and ending with the dry mix. Gently fold each addition until just combined to avoid overmixing, which can make the cake tough. Now stir in the white vinegar and red food coloring, folding until your batter is evenly tinted a gorgeous red.
Step 5: Create the Marble Effect
Remove a small portion of the red batter and leave it as your lighter base (without food coloring). Pour your main red velvet batter into the loaf pan, then dollop the lighter batter on top. Use a knife to gently swirl both batters, creating that signature marble pattern that makes this loaf cake so visually delightful.
Step 6: Bake to Perfection
Bake your loaf in the preheated oven for 50 to 60 minutes or until a toothpick inserted into the center comes out clean. It’s important not to rush this process; the slow and steady bake ensures moistness while letting the red velvet flavors develop beautifully. Let the cake cool completely in the pan before slicing to keep the marbled pattern intact.
How to Serve Red Velvet Marble Loaf Cake
Garnishes
Enhance your Red Velvet Marble Loaf Cake with a light dusting of powdered sugar or a simple cream cheese glaze. Both add a perfect touch of sweetness and complement the mild cocoa and vanilla notes beautifully. Fresh berries or edible flowers on the side bring freshness and make the presentation utterly charming.
Side Dishes
This cake pairs wonderfully with a scoop of vanilla ice cream or a dollop of whipped cream, turning your treat into an indulgent dessert experience. For a comforting contrast, serve it alongside a warm cup of coffee or a creamy hot chocolate to highlight the cake’s moist texture and rich flavor.
Creative Ways to Present
Slice your Red Velvet Marble Loaf Cake thick and layer it with frosting or jam for mini cake sandwiches. Alternatively, serve small cubes on skewers with fresh fruit for an elegant party bite. Presentation is half the fun, and this cake’s vibrant swirls make any arrangement visually appealing and enticing.
Make Ahead and Storage
Storing Leftovers
Once your Red Velvet Marble Loaf Cake has cooled completely, wrap it tightly in plastic wrap or store it in an airtight container at room temperature for up to three days. Keeping it sealed prevents drying out, preserving the moist and tender crumb you worked so hard to create.
Freezing
This loaf cake freezes beautifully! Wrap it tightly in plastic wrap and then again in foil to keep freezer odors at bay. Freeze for up to three months. When you’re ready to enjoy, thaw it overnight in the refrigerator, then bring it to room temperature before slicing for the best texture and flavor.
Reheating
To enjoy your leftover Red Velvet Marble Loaf Cake warm, pop individual slices in the microwave for 15-20 seconds or heat in a low oven (around 150°C / 300°F) for 10 minutes. This gently revives the cake’s moistness and brings out its enticing aroma fresh from the oven.
FAQs
Can I use regular milk instead of buttermilk?
Absolutely! If you don’t have buttermilk on hand, just add 1 tablespoon of vinegar or lemon juice to 1 cup of regular milk, let it sit for 5 minutes, and then use it as a substitute. This adds the same tang that helps activate the baking soda for a tender crumb in your Red Velvet Marble Loaf Cake.
Is the red food coloring necessary?
The red food coloring is key to achieving that iconic red velvet hue which makes this cake visually special. While the cake will still taste delicious without it, the dramatic color contrast in the marble effect wouldn’t be nearly as striking.
How do I ensure the marble effect turns out well?
Keep your lighter batter uncolored and swirl it gently into the red batter using a knife or skewer once in the loaf pan—avoid overmixing to maintain distinct swirls. This technique creates that beautiful marbled look unique to the Red Velvet Marble Loaf Cake.
Can I make this recipe gluten-free?
Yes, by substituting the all-purpose flour with a gluten-free baking blend that measures cup for cup, you can make a delicious gluten-free version. Just make sure your baking powder and cocoa powder are gluten-free as well.
What frosting pairs best with this cake?
Cream cheese frosting is the classic and most popular choice. Its tangy richness wonderfully complements the cocoa and vinegar flavors in the cake. Alternatively, a simple vanilla glaze or mascarpone spread are delightful options to keep things light and fresh.
Final Thoughts
There’s something truly special about the Red Velvet Marble Loaf Cake that goes beyond just its stunning appearance—a moist, tender crumb combined with striking swirls of flavor and color makes it an absolute crowd-pleaser. Whether for a cozy afternoon tea or an impressive dessert centerpiece, I encourage you to bring this recipe to life in your kitchen. Happy baking, and enjoy every delightful bite!
PrintRed Velvet Marble Loaf Cake Recipe
This Red Velvet Marble Loaf Cake combines the classic rich and moist red velvet flavor with a beautiful marble swirl effect, creating a visually stunning and delicious dessert. Perfect for any occasion, this loaf cake offers a tender crumb with a hint of cocoa, enhanced by the tang of buttermilk and vinegar, making it a delightful treat for red velvet lovers and cake enthusiasts alike.
- Prep Time: 15 minutes
- Cook Time: 55 minutes
- Total Time: 1 hour 10 minutes
- Yield: 1 loaf cake, about 10–12 servings 1x
- Category: Dessert
- Method: Baking
- Cuisine: American
- Diet: Vegetarian
Ingredients
Dry Ingredients
- 2 cups (250g) all-purpose flour
- 1 ½ tsp baking powder
- ½ tsp baking soda
- ½ tsp salt
- 2 tbsp (15g) cocoa powder
Wet Ingredients
- ½ cup (115g) unsalted butter, softened
- 1 cup (200g) sugar
- 2 large eggs
- 1 cup (240ml) buttermilk (or milk + 1 tbsp vinegar)
- 2 tsp vanilla extract
- 1 tbsp red food coloring (gel or liquid)
- 2 tsp white vinegar
Instructions
- Preheat and Prepare Pan: Preheat your oven to 175°C (350°F). Grease and line a 9×5-inch loaf pan with parchment paper to prevent sticking and ensure easy removal.
- Mix Dry Ingredients: In a medium bowl, whisk together the all-purpose flour, baking powder, baking soda, salt, and cocoa powder until well combined.
- Cream Butter and Sugar: In a separate large bowl, beat the softened butter and sugar together using an electric mixer until the mixture is light and fluffy. This step is crucial to incorporate air and achieve a tender cake texture.
- Add Eggs and Vanilla: Beat in the eggs one at a time, ensuring each egg is fully incorporated before adding the next. Stir in the vanilla extract for flavor.
- Combine Ingredients: Gradually add the dry ingredients to the butter mixture in three additions, alternating with the buttermilk. Begin and end with the dry ingredients, mixing each addition just until combined to avoid overmixing and tough cake.
- Add Coloring and Vinegar: Stir in the white vinegar and red food coloring until the batter is uniformly colored a vibrant red shade.
- Create Marble Effect: Remove a small portion of the red velvet batter to keep plain (light-colored). Pour the main red velvet batter into the prepared loaf pan, then dollop the plain batter over it. Use a knife to gently swirl the two batters together to create a beautiful marble pattern.
- Bake: Place the loaf pan in the preheated oven and bake for 50 to 60 minutes. Check for doneness by inserting a toothpick into the center; it should come out clean or with a few moist crumbs.
- Cool and Serve: Allow the cake to cool in the pan for about 15 minutes, then transfer it to a wire rack to cool completely before slicing. Serve and enjoy your delightful Red Velvet Marble Loaf Cake!
Notes
- Use room temperature ingredients for better batter consistency.
- Buttermilk can be substituted with milk plus 1 tablespoon vinegar or lemon juice.
- Adjust red food coloring amount according to desired intensity.
- A toothpick test ensures the cake is perfectly baked.
- Store leftovers in an airtight container at room temperature for up to 3 days or refrigerate for up to 1 week.
- For a dairy-free version, use non-dairy butter and buttermilk alternatives.
Nutrition
- Serving Size: 1 slice (based on 12 slices per loaf)
- Calories: 280 kcal
- Sugar: 22 g
- Sodium: 220 mg
- Fat: 12 g
- Saturated Fat: 7 g
- Unsaturated Fat: 4 g
- Trans Fat: 0.3 g
- Carbohydrates: 36 g
- Fiber: 1.5 g
- Protein: 4 g
- Cholesterol: 65 mg
Keywords: red velvet cake, marble cake, loaf cake, red velvet loaf, marble loaf cake, baking, dessert, cake recipe, homemade cake