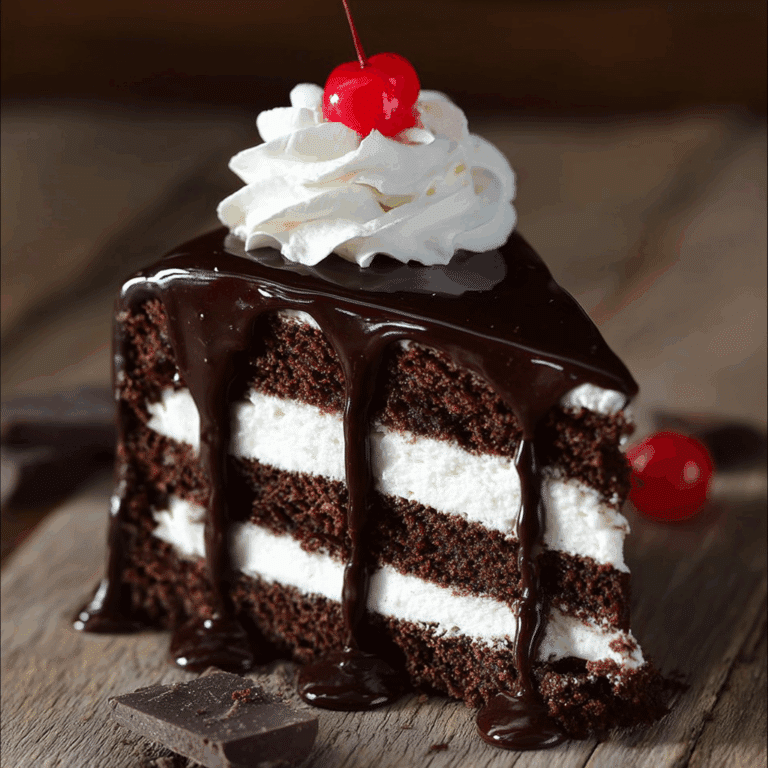
Rich Chocolate Cake Layers** ** Recipe
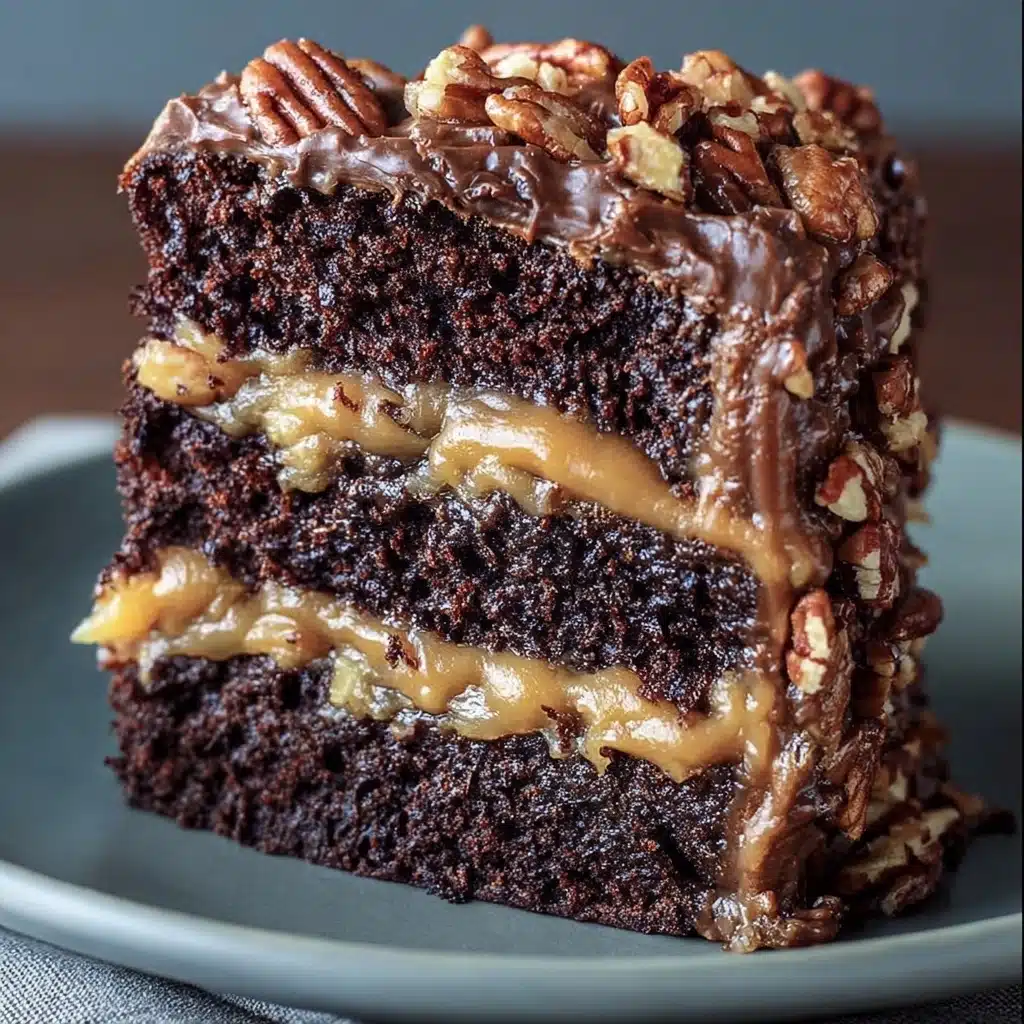
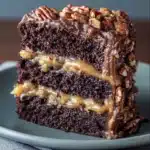
When you want a real showstopper for any celebration, look no further than these Rich Chocolate Cake Layers. This cake is a chocolate lover’s dream, stacked high with moist, deeply flavored cake, an irresistible peanut butter caramel frosting, and a generous crown of crunchy toasted pecans. Every bite is an absolute symphony of texture: soft, tender cake meets silky-sweet frosting and the perfect pecan crunch. Whether you’re celebrating a birthday or just treating yourself and friends, these Rich Chocolate Cake Layers are a surefire way to create unforgettable dessert memories.

Ingredients You’ll Need
Baking beautiful Rich Chocolate Cake Layers doesn’t require a culinary degree—just some staple ingredients and a pinch of care. Every ingredient is here for a reason, each one building fabulous flavor, texture, and that signature rich color. Here’s what you’ll need—plus a handy tip for each!
- All-purpose flour: The foundation of the cake, giving it structure without being too heavy or dense.
- Unsweetened cocoa powder: Choose a good quality, Dutch-processed cocoa for deep chocolate flavor and that dramatic dark hue.
- Granulated sugar: Sweetens the cake and locks in moisture, ensuring every bite is decadent.
- Baking soda & baking powder: This power duo guarantees the perfect rise and a beautifully airy crumb.
- Salt: Just a bit, to balance sweetness and intensify the chocolate.
- Milk (any kind): Adds tenderness and richness; be sure it’s at room temperature for smooth blending.
- Vegetable oil: Helps keep the Rich Chocolate Cake Layers extra moist, even days later.
- Eggs (large, room temp): Bind the batter and contribute to a luxuriously soft structure.
- Vanilla extract: Accentuates the chocolate with a subtle, aromatic note.
- Boiling water (or strong coffee): Hot liquid unlocks and blooms the cocoa, ensuring every corner is deeply chocolaty—coffee intensifies the flavor even more.
- Unsalted butter (softened): In the frosting, butter whips up fluffy and creamy, letting the flavors shine.
- Creamy peanut butter: Go for the classic, commercial kind for a smooth, cohesive frosting (no separation!).
- Powdered sugar: Sift it well for a lump-free, cloud-like frosting texture.
- Heavy cream or milk: Offers extra creaminess and helps adjust the frosting to your preferred consistency.
- Caramel sauce: Brings a gorgeous, toffee-like depth to the frosting; homemade or store-bought both work wonderfully.
- Pecans (chopped): When toasted, their buttery crunch is the perfect finish for Rich Chocolate Cake Layers.
- Vanilla extract & salt (for frosting): For flavor balance and extra fragrance in that dreamy peanut butter caramel frosting.
How to Make Rich Chocolate Cake Layers
Step 1: Prep Your Pans and Oven
Begin your journey to bakery-level cake by preheating your oven to 350°F (175°C). Grease and flour three 8-inch round cake pans and line each bottom with parchment paper. This extra step guarantees that your Rich Chocolate Cake Layers will release easily—no cake left behind!
Step 2: Mix Up the Dry Ingredients
In a large, roomy bowl, combine the all-purpose flour, cocoa powder, granulated sugar, baking soda, baking powder, and salt. Give everything a good whisk to distribute the leavening and cocoa evenly. This prevents clumps and means every inch bakes up perfectly.
Step 3: Blend Wet Ingredients
In another bowl, whisk together the milk, vegetable oil, eggs, and vanilla extract. Make sure all are at room temperature—this helps the batter come together beautifully and keeps those Rich Chocolate Cake Layers light and luscious.
Step 4: Marry Wet and Dry
Pour the wet mixture right into the bowl of dry ingredients. Mix gently—either with a mixer on low speed or by hand—just until you don’t see any streaks of flour. Overmixing can make a cake tough, so stop once it’s nice and smooth!
Step 5: Add the Hot Magic
Now, carefully pour in the boiling water (or coffee, for the bold!) and whisk until the batter is shiny and runny. Don’t worry if it seems thin: this is the secret to the Rich Chocolate Cake Layers’ astonishing moistness and silky crumb.
Step 6: Bake to Perfection
Divide the glossy batter evenly into your pans and smooth the tops. Pop them into the oven for 25-30 minutes. You’ll know they’re ready when a skewer poked in the middle comes out with moist crumbs, but not sticky batter. Place them on a rack and cool in the pans for 10-15 minutes before turning them out to finish cooling.
Step 7: Level and Chill
Once completely cool, if there’s any dome on top, gently saw it off with a serrated knife. Flat cake layers mean neat, stable stacking—and a stunning finished Rich Chocolate Cake Layers creation!
How to Serve Rich Chocolate Cake Layers
Garnishes
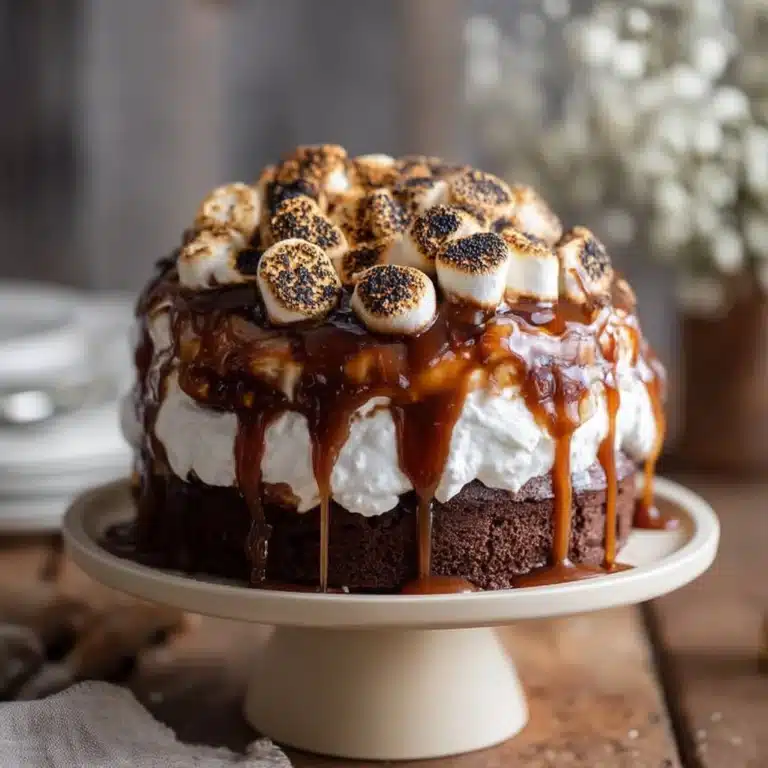
When it comes to Rich Chocolate Cake Layers, the finishing touches are part of the fun! After generously swooping on that peanut butter caramel frosting, crown your cake with a heap of toasted pecans—let them tumble down the sides for drama. Tuck a few whole pecans or a drizzle of extra caramel sauce over the top just before serving for an eye-catching, decadent finish.
Side Dishes
This cake is so rich, it truly shines on its own, but pairing it is an experience in itself. Think small scoops of vanilla bean ice cream, tart berries to balance the sweetness, or even a cold glass of milk or a robust espresso. These little touches all highlight the stunning flavors in your Rich Chocolate Cake Layers.
Creative Ways to Present
Feeling fancy? Try baking the batter as cupcakes for personal-sized treats, or stack mini cakes with individual frosting swirls. For special occasions, arrange edible gold leaf or chocolate shavings on top, or serve with swirls of whipped cream and a scattering of chopped peanut brittle, upping the wow factor of your Rich Chocolate Cake Layers.
Make Ahead and Storage
Storing Leftovers
If you’re lucky enough to have any cake left, store slices or the whole cake in an airtight container in the fridge. These Rich Chocolate Cake Layers keep well for 3-4 days—the moisture and flavor actually get even better by day two! Just let slices come to room temp before enjoying for peak softness and flavor.
Freezing
Both the unfrosted cake layers and the assembled cake freeze beautifully. For layers, wrap each one snugly in plastic wrap and aluminum foil, then freeze for up to two months. For the whole cake, freeze uncovered just until firm, then wrap well. Thaw in the fridge overnight and bring to room temperature before serving to keep your Rich Chocolate Cake Layers tasting bakery-fresh.
Reheating
Chocolate cake is best served at room temperature, but if your cake is very cold, pop a slice in the microwave for 8-10 seconds—just enough to take off the chill and slightly soften the frosting. Avoid overheating, as it can melt the glorious peanut butter caramel frosting!
FAQs
Can I make Rich Chocolate Cake Layers ahead of time?
Absolutely! In fact, baking the chocolate layers a day ahead can enhance their flavor and give you stress-free assembly time. Wrap cooled cake layers tightly and store them at room temperature until ready to frost and decorate.
What type of peanut butter works best in the frosting?
Stick with classic, creamy peanut butter from a well-known brand—like Jif or Skippy. Avoid natural varieties with oil separation, as they’re harder to blend smoothly and may affect the finished texture of your frosting.
How do I prevent my Rich Chocolate Cake Layers from sticking to the pan?
Always grease and flour your pans and line the bottoms with parchment. That double insurance ensures your cake layers release cleanly every time, so none of that chocolatey goodness is lost.
Can I use a different nut for the topping?
Definitely! Pecans lend a lovely buttery crunch, but toasted walnuts, hazelnuts, or even salted peanuts can bring a new twist to your Rich Chocolate Cake Layers. Mix and match according to your taste or dietary needs.
What’s the best way to slice the cake for clean layers?
Use a sharp, long-bladed knife and gently wipe clean between slices. Chilling the cake before cutting can also help you achieve those gorgeous, bakery-style clean lines that showcase your Rich Chocolate Cake Layers to perfection.
Final Thoughts
If you’re ready for a dessert that stops the show and starts the smiles, you simply have to bake these Rich Chocolate Cake Layers. They’re luscious, loaded with flavor and textures, and are guaranteed to make you the star baker of any gathering. Dive in, get baking, and create some absolutely delicious memories!
PrintRich Chocolate Cake Layers** ** Recipe
Indulge in the ultimate chocolate cake experience with this decadent treat featuring moist chocolate layers, a luxurious peanut butter caramel frosting, and crunchy toasted pecans for added texture and flavor.
- Prep Time: 1 hour
- Cook Time: 25-30 minutes per cake layer
- Total Time: Approx. 5 hours
- Yield: 12–16 servings 1x
- Category: Dessert
- Method: Baking
- Cuisine: American
- Diet: Vegetarian
Ingredients
Rich Chocolate Cake Layers:
- 2 1/4 cups (270g) all-purpose flour
- 1 cup (95g) unsweetened cocoa powder
- 2 1/2 cups (500g) granulated sugar
- 2 teaspoons baking soda
- 1 teaspoon baking powder
- 1 teaspoon salt
- 1 cup (240ml) milk
- 1/2 cup (120ml) vegetable oil
- 3 large eggs
- 2 teaspoons vanilla extract
- 1 cup (240ml) boiling water
Peanut Butter Caramel Frosting:
- 1 cup (226g) unsalted butter
- 1 cup (250g) creamy peanut butter
- 4–5 cups (480-600g) powdered sugar
- 1/4 cup (60ml) heavy cream or milk
- 1/4 cup (60ml) prepared caramel sauce
- 1 teaspoon vanilla extract
- 1/4 teaspoon salt
Toasted Pecans:
- 1 1/2 cups (approx. 150g) pecans, roughly chopped
Instructions
- Rich Chocolate Cake Layers: Preheat oven, prepare pans, combine dry ingredients, combine wet ingredients, mix wet and dry, add hot liquid, bake, cool.
- Peanut Butter Caramel Frosting: Beat butter and peanut butter, add powdered sugar, add liquids and flavor, beat until light and fluffy.
- Toasted Pecans: Toast pecans, cool.
- Assembly & Decoration: Stack and crumb coat, final frosting, garnish, drizzle (optional), chill and serve, storage.
Notes
- You can use hot coffee instead of boiling water for a richer chocolate flavor in the cake.
- For a smoother frosting, ensure the butter is softened properly before mixing.
- Adjust the sweetness of the frosting by adding more or less powdered sugar to suit your taste.
- Ensure the caramel sauce is at room temperature before incorporating it into the frosting.
Nutrition
- Serving Size: 1 slice (assuming 1/12 of the cake)
- Calories: Approx. 550 kcal
- Sugar: Approx. 45g
- Sodium: Approx. 380mg
- Fat: Approx. 30g
- Saturated Fat: Approx. 12g
- Unsaturated Fat: Approx. 15g
- Trans Fat: 0g
- Carbohydrates: Approx. 65g
- Fiber: Approx. 4g
- Protein: Approx. 8g
- Cholesterol: Approx. 70mg
Keywords: Chocolate Cake, Peanut Butter Frosting, Caramel, Pecans, Dessert Recipe